OpenEverest Backup & Restore with Self-Hosted S3 Storage: A Complete Step-by-Step Guide
 Madhav Dhatrak
Table of Contents
- Introduction
- Prerequisites
- Setting Up RustFS
- Creating a Bucket in RustFS
- Connecting RustFS to OpenEverest
- Deploying a Database Cluster and Setting Up Scheduled Backups
- Taking a Backup
- Restoring from a Backup
- Another way to restore: Create DB from a backup
- Conclusion
Introduction
Backups are an important part of running any database in production. They help protect your data from accidental deletion, hardware failures, software bugs, or other unexpected issues. A good backup strategy ensures that you can recover your data whenever needed.
OpenEverest provides an easy way to create and restore database backups. It supports S3-compatible object storage, which means you can store backups on cloud providers like AWS S3, or on your own self-hosted storage.
In this guide, we will use RustFS, a self-hosted, open-source, S3-compatible object storage, instead of a cloud service. This gives you full control over your data while reducing dependency on third-party providers.
Whether you are setting up a home lab, testing locally, or building an on-premises environment, this guide walks through the complete process: configuring RustFS, connecting it to OpenEverest, creating backups, and restoring your database when needed.
Prerequisites
Before you start, make sure you have:
- A running Kubernetes cluster (k3s, kind, or any other distribution)
- OpenEverest installed, with at least one database engine enabled (PostgreSQL, in this guide)
kubectlconfigured for your clusterhelminstalled- Basic familiarity with the OpenEverest UI
Note: This guide assumes OpenEverest is already installed and running. If you haven’t set that up yet, check out Running Databases on Kubernetes Locally with OpenEverest first, then come back here.
1. Setting Up RustFS
RustFS is installed using Helm. By default, it runs in distributed mode with four replicas for high availability. For this guide, we only need a simple test environment, so we will use standalone mode. This runs a single RustFS instance and is enough for testing and learning.
Step 1.1: Add the RustFS Helm repo
helm repo add rustfs https://charts.rustfs.com
helm repo update
Step 1.2: Check the default settings
Before we change anything, let’s see what settings RustFS uses by default:
helm show values rustfs/rustfs
Helm does not remove these defaults when we use an override file. It only changes the parts we mention. Everything else stays the same.
Step 1.3: Create an override-values.yaml file
cat <<EOF > override-values.yaml
replicaCount: 1

mode:
  standalone:
    enabled: true
  distributed:
    enabled: false

secret:
  rustfs:
    access_key: <your-access-key>
    secret_key: <your-secret-key>

ingress:
  enabled: false
EOF
Replace <your-access-key> and <your-secret-key> with your own values. Using your own credentials is a good practice and helps keep your storage secure.
Step 1.4: Install RustFS using the override file
kubectl create namespace rustfs
helm install rustfs rustfs/rustfs -n rustfs -f override-values.yaml
Step 1.5: Check that it’s running
$ kubectl get pods -n rustfs

NAME                          READY   STATUS    RESTARTS   AGE
rustfs-c8dd447c9-4wx2q         1/1     Running   0          47s
$ kubectl get svc -n rustfs

NAME         TYPE        CLUSTER-IP     EXTERNAL-IP   PORT(S)             AGE
rustfs-svc   ClusterIP   10.43.221.127  <none>        9000/TCP,9001/TCP   3m54s
You should see one pod running, and a service with two ports:
- 9000 — used to store and fetch data (this is what OpenEverest talks to)
- 9001 — the web console, where you can view your files
Step 1.6: Open the web console
Forward the ports so you can open it in your browser:
kubectl port-forward -n rustfs svc/<service-name> 9000:9000 9001:9001
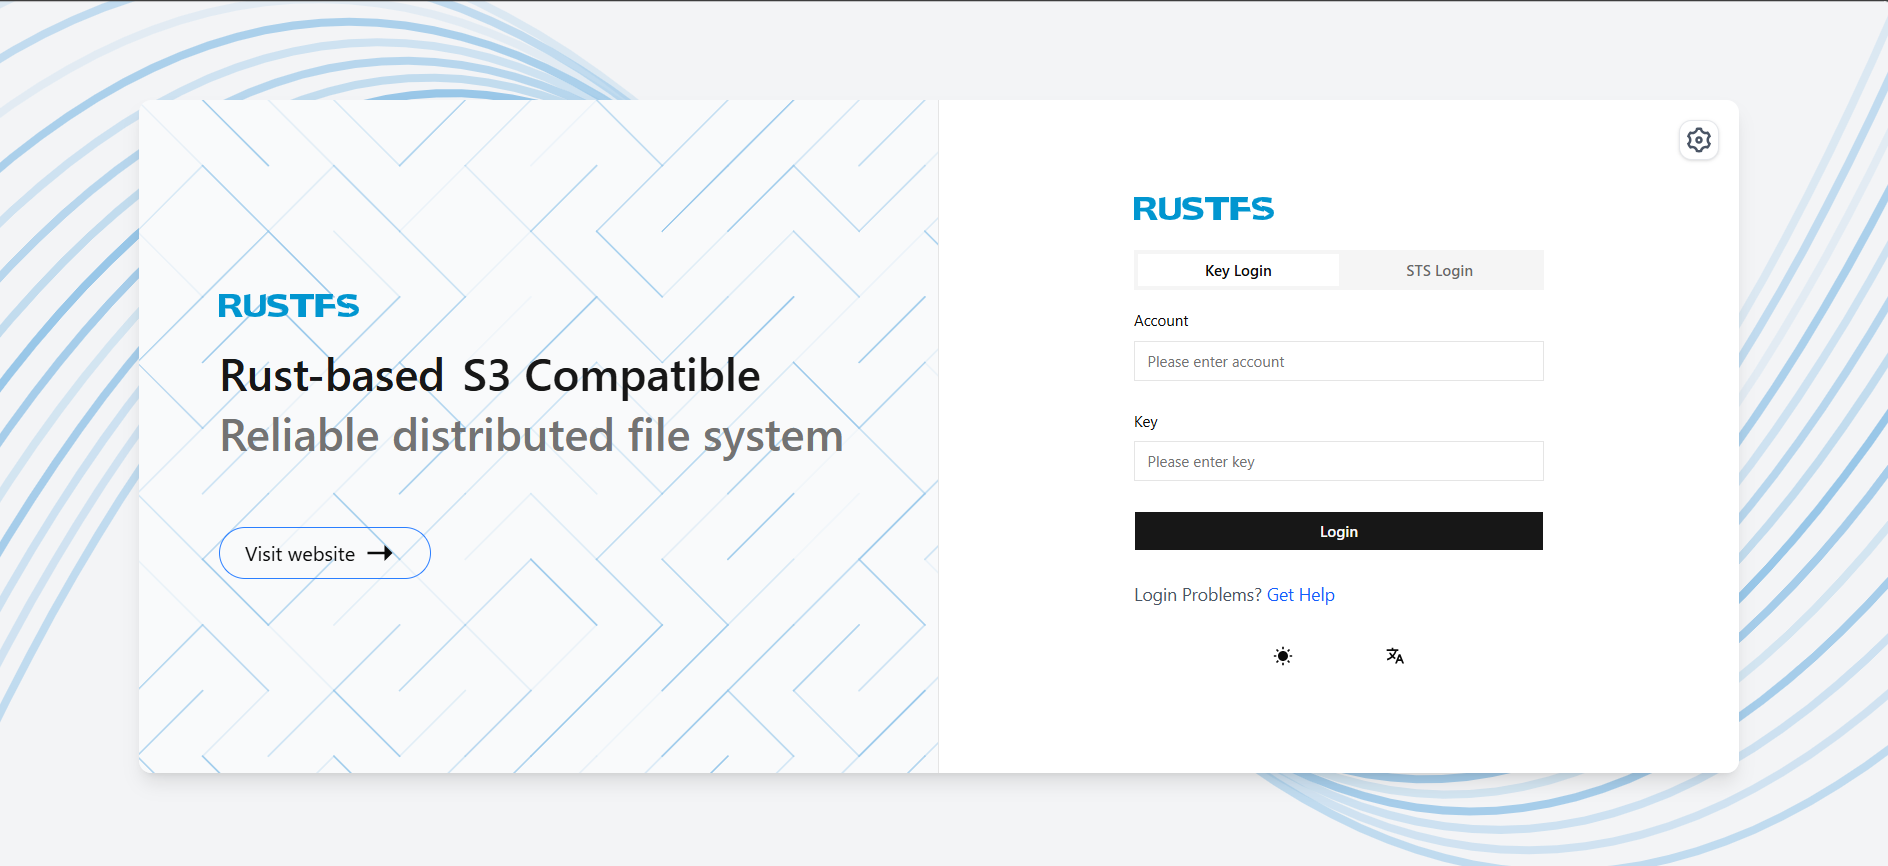
Now open http://localhost:9001 in your browser and log in using your access key and secret key.
2. Creating a Bucket in RustFS
Once you can open the RustFS web console, the next step is to create a bucket. A bucket is just a storage container, like a folder, where your backups will be saved.
Step 2.1: Log in to the console
Open http://localhost:9001 in your browser and log in using the access key and secret key you set earlier.
Step 2.2: Create a bucket
- Go to Browser in the left menu.
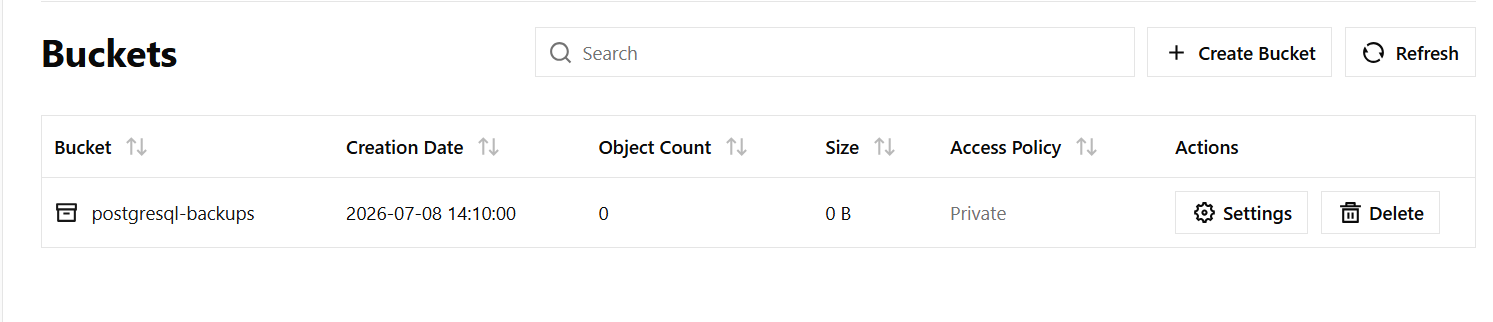
- Click Create Bucket, in the top right.
- Give it a name, for example
postgresql-backups. - Click Create.
Your new bucket should now appear in the bucket list.
Step 2.3: Note down what you’ll need next
Before moving on, make sure you have these ready:
- Bucket name:
postgresql-backups - Access key and secret key: the same ones you set in
override-values.yaml - Endpoint: we’ll need this in the next step, when connecting RustFS to OpenEverest. The endpoint will look like this:
http://<service-name>.rustfs.svc.cluster.local:9000
3. Connecting RustFS to OpenEverest
Now that RustFS is running and you have a bucket ready, the next step is to add it to OpenEverest as a backup storage.
Step 3.1: Open the Backup Storages page
In the OpenEverest UI, go to Settings → Backup Storages.

Step 3.2: Click Add backup storage
On the UI, you will see a form like this. Fill in the form with the following details:
- Name:
rustfs-backup-storage - Namespace:
everest - Type:
S3 Compatible - Bucket Name:
postgresql-backups - Region:
us-east-1 - Endpoint:
http://<service-name>.rustfs.svc.cluster.local:9000 - Access Key: your RustFS access key
- Secret Key: your RustFS secret key
- Verify TLS certificate: Unchecked
- Force path-style URL access: Checked
Step 3.3: Click Add
OpenEverest will try to connect to RustFS using these details. If everything is correct, the storage will be added successfully, and you’ll see it listed under Backup Storages.

Note: Region isn’t used directly by RustFS, but the field is still required by the client form, so any AWS-style region string works. Force path-style URL access should stay checked, because RustFS supports path-style addressing by default. Since this guide does not configure TLS certificates, RustFS is running over plain HTTP here, so Verify TLS certificate is unchecked and the endpoint uses
http://. RustFS also supports HTTPS if you configure TLS certificates in your deployment; in that case, enable certificate verification and usehttps://in the endpoint.
4. Deploying a Database Cluster and Setting Up Scheduled Backups
With RustFS connected, the next step is to create a database. This guide uses PostgreSQL.
Step 4.1: Create a new database
From the OpenEverest homepage, click Create database.
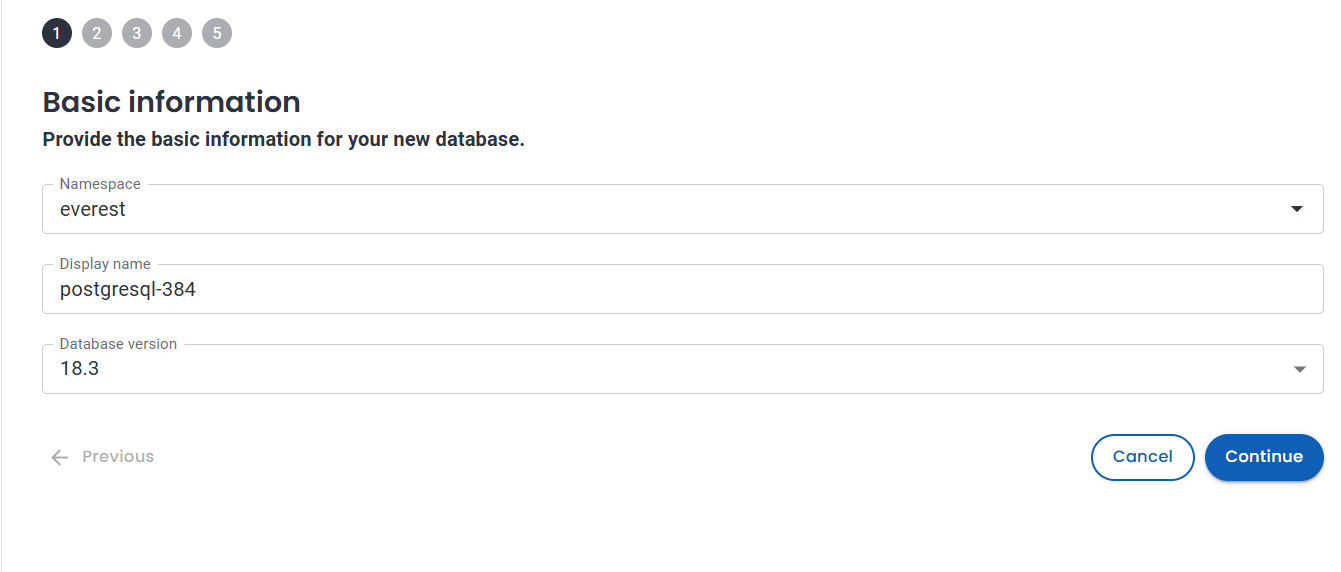
Step 4.2: Basic information
Select PostgreSQL as the engine. On this first screen, you’ll set:
- Namespace — the namespace where this database will run, for example
everest - Display name — a name for your database, for example
postgresql-384 - Database version — the PostgreSQL version to use, for example
18.3
Click Continue.
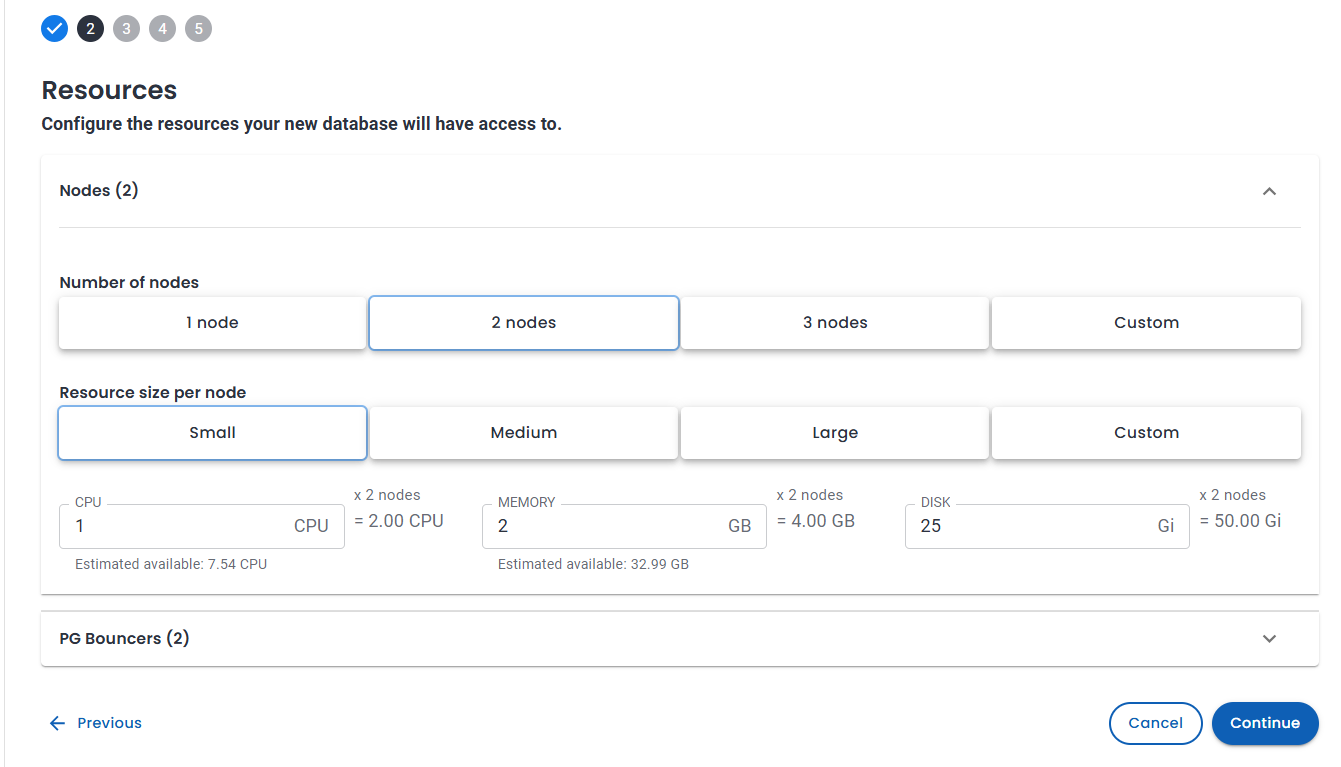
Step 4.3: Resources
Next, configure the resources for your database:
- Number of nodes
- Resource size per node
- PG Bouncers
Pick whatever fits your environment.for a small test setup, 1 node with the Small size is enough.
Click Continue.
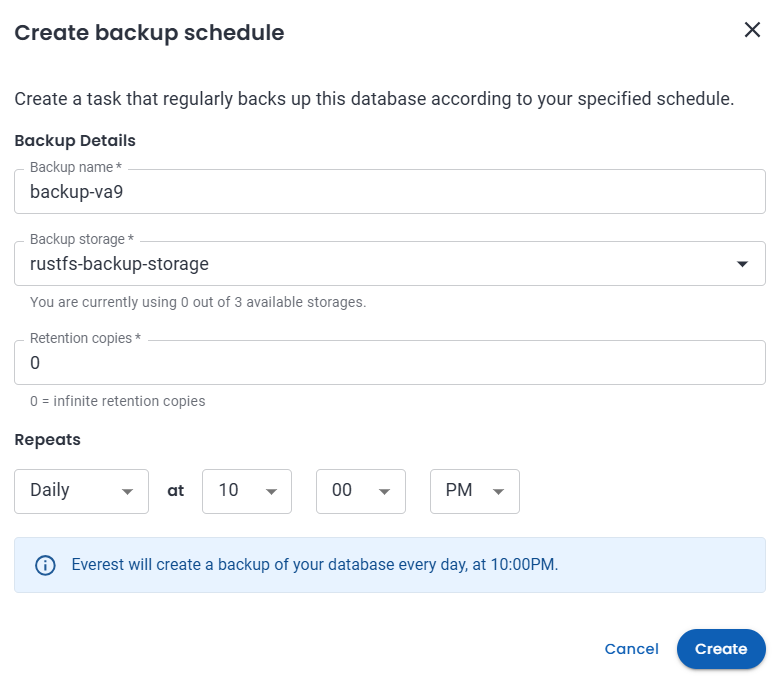
Step 4.4: Set the backup storage
As you move forward in the wizard, you’ll reach a Backups step. Here, you can:
- Select
rustfs-backup-storageas your backup storage location - Turn on a backup schedule, for example daily at a fixed time
- Set a retention policy, which controls how many backup copies to keep at once
Step 4.5: Finish and create
Complete the rest of the wizard and click Create. OpenEverest will provision the cluster — this may take a few minutes.
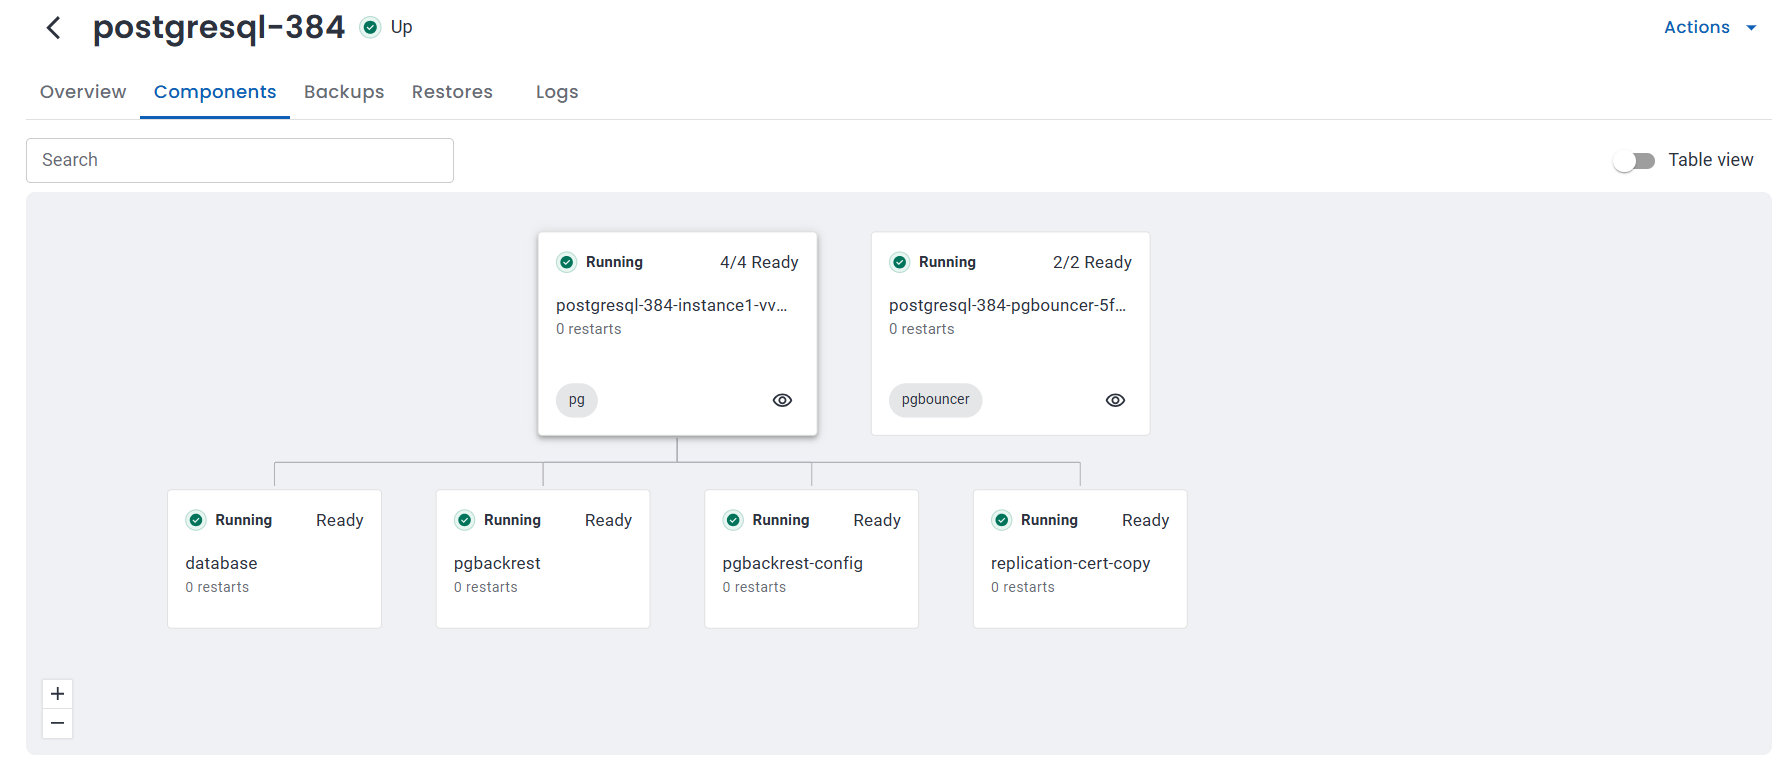
Step 4.6: Confirm it’s running
$ kubectl get pods -n everest

NAME                                               READY   STATUS      RESTARTS   AGE
percona-postgresql-operator-5c4dd655bd-9hmzm       1/1     Running     0          83m
percona-server-mongodb-operator-7bb69bb49b-nq2xp   1/1     Running     0          83m
percona-xtradb-cluster-operator-684cd7646c-286q6   1/1     Running     0          83m
postgresql-384-backup-tssw-6chzs                   0/1     Completed   0          102s
postgresql-384-instance1-vvmn-0                    4/4     Running     0          118s
postgresql-384-pgbouncer-5fd7c9df7d-xflst          2/2     Running     0          115s
postgresql-384-repo-host-0                         2/2     Running     0          116s
You should see the new Postgres instance, along with its pgBouncer and repo-host pods, all in Running state.
5. Taking a Backup
Now that the database is running and connected to RustFS, let’s take a backup and confirm it gets stored in our self-hosted S3 bucket.
Step 5.1: Go to the Backups tab
Open your database cluster in the OpenEverest UI, then click the Backups tab.

Step 5.2: Create a backup
Click Create backup, choose rustfs-backup-storage as the storage location, and start it.
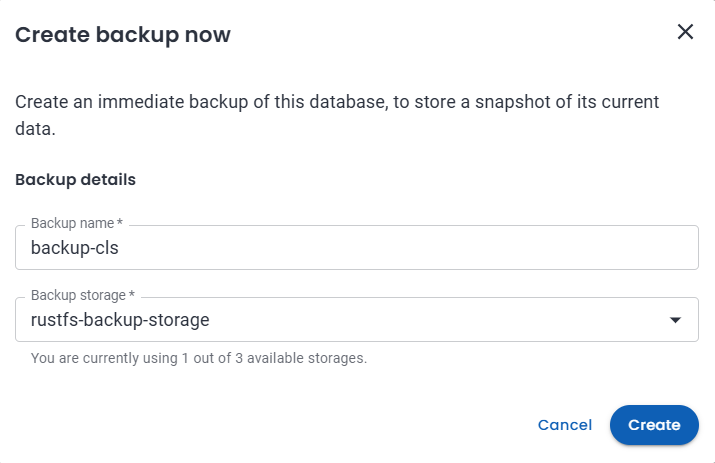
Click Create
Step 5.3: Wait for it to finish
The status will move from Starting to Running, and finally to Succeeded. This can take a minute or two, depending on the size of your database.

Step 5.4: Confirm the backup is actually in RustFS
Open the RustFS web console (http://localhost:9001) and browse into your bucket. You should see a folder structure like this:
- A timestamped folder ending in
F(this is your full backup) - A
backup.history/folder backup.infoandbackup.info.copyfiles
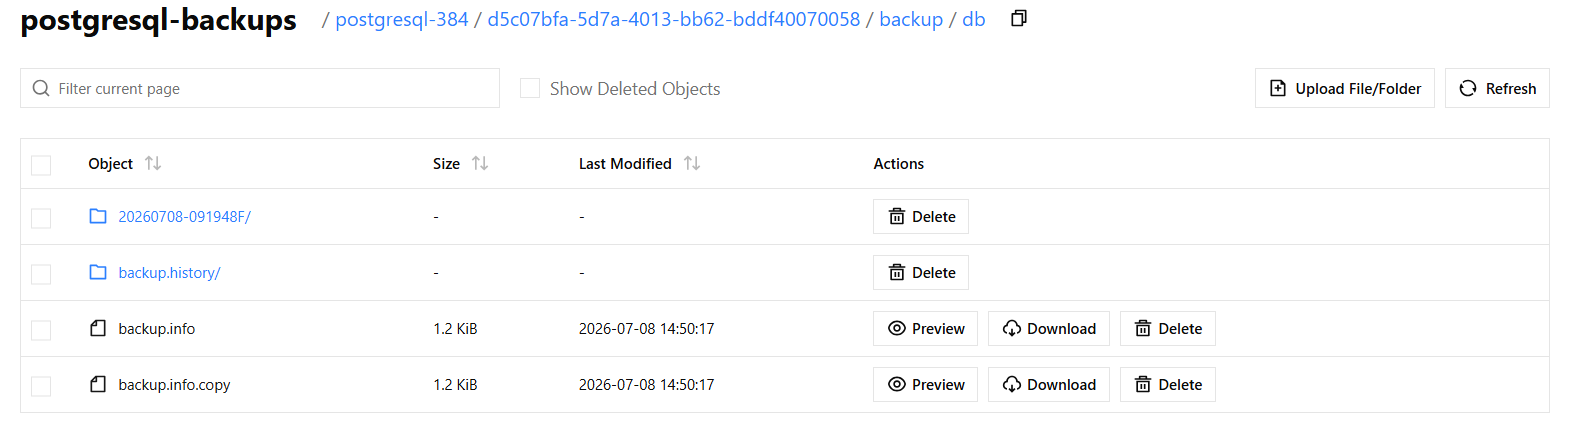
These are created by pgBackRest, the tool OpenEverest uses under the hood to take Postgres backups.
6. Restoring from a Backup
Now let’s confirm the backup actually works, using a simple test with real data.
Step 6.1: Add some data
Connect to your running Postgres cluster:
kubectl exec -it <postgresql-instance-pod> -n everest -- psql
Create a table and insert two rows:
CREATE TABLE blog_demo (id SERIAL PRIMARY KEY, note TEXT, created_at TIMESTAMP DEFAULT now());

INSERT INTO blog_demo (note) VALUES ('before-backup-row-1');
INSERT INTO blog_demo (note) VALUES ('before-backup-row-2');

SELECT * FROM blog_demo;
You should see 2 rows.
$ kubectl exec -it postgresql-384-instance1-vvmn-0 -n everest -- bash

bash-5.1$ psql
psql (18.3 - Percona Server for PostgreSQL 18.3.1)
Type "help" for help.

postgres=# CREATE TABLE blog_demo (
    id SERIAL PRIMARY KEY,
    note TEXT,
    created_at TIMESTAMP DEFAULT now()
);
CREATE TABLE

postgres=# INSERT INTO blog_demo (note) VALUES ('before-backup-row-1');
INSERT 0 1

postgres=# INSERT INTO blog_demo (note) VALUES ('before-backup-row-2');
INSERT 0 1

postgres=# SELECT * FROM blog_demo;
 id |        note         |         created_at
----+---------------------+----------------------------
  1 | before-backup-row-1 | 2026-07-08 09:55:34.78151
  2 | before-backup-row-2 | 2026-07-08 09:55:42.07359
(2 rows)
Step 6.2: Take a backup
Follow the steps from the previous section and wait for the status to show Succeeded.
Step 6.3: Add one more row
INSERT INTO blog_demo (note) VALUES ('after-backup-should-disappear');

SELECT count(*) FROM blog_demo;
This should now show 3. This row is our test — if the restore works, it should disappear.
$ kubectl exec -it postgresql-384-instance1-vvmn-0 -n everest -- bash

bash-5.1$ psql
psql (18.3 - Percona Server for PostgreSQL 18.3.1)
Type "help" for help.

postgres=# INSERT INTO blog_demo (note) VALUES ('after-backup-should-disappear');
INSERT 0 1

postgres=# SELECT count(*) FROM blog_demo;
 count
-------
     3
(1 row)
Step 6.4: Restore from the backup
Go to the cluster’s Actions menu and click Restore from a backup. Select the backup you just took, then click Restore.
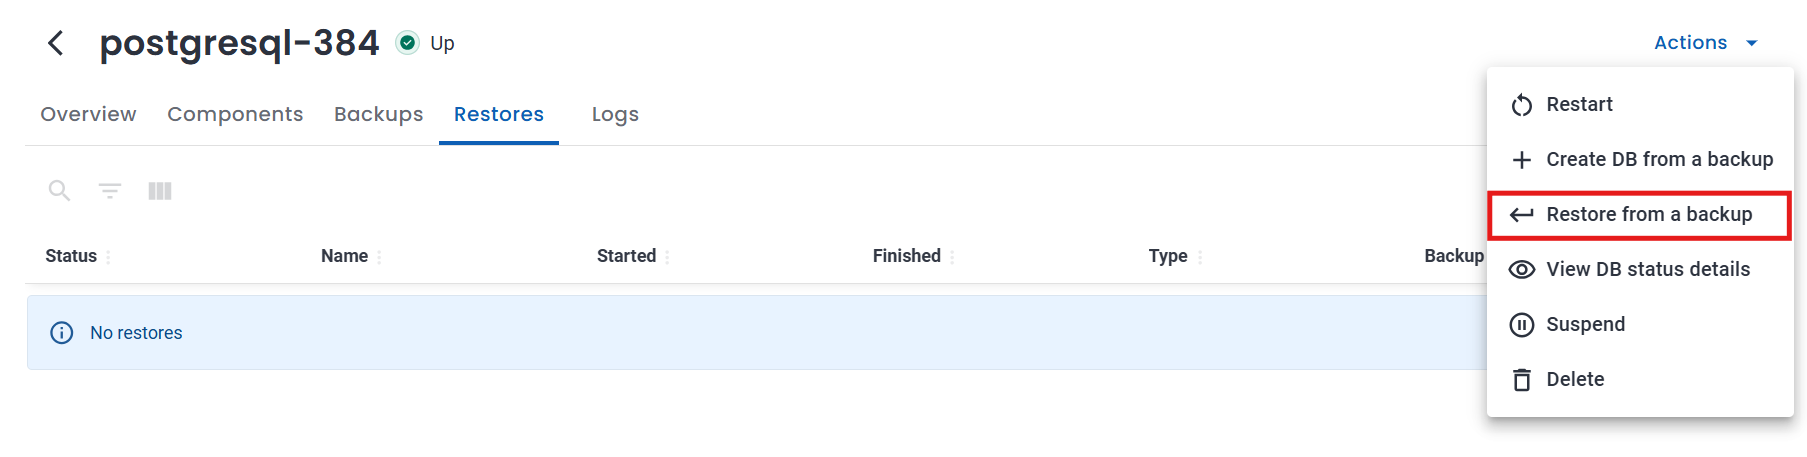
The cluster will briefly go into a restoring state, then come back Up once the restore finishes.
Step 6.5: Verify the data
Reconnect and check:
kubectl exec -it <postgresql-instance-pod> -n everest -- psql
SELECT * FROM blog_demo;
SELECT count(*) FROM blog_demo;
$ kubectl exec -it postgresql-384-instance1-vvmn-0 -n everest -- bash

bash-5.1$ psql
psql (18.3 - Percona Server for PostgreSQL 18.3.1)
Type "help" for help.

postgres=# SELECT * FROM blog_demo;
 id |        note         |         created_at
----+---------------------+----------------------------
  1 | before-backup-row-1 | 2026-07-08 09:55:34.78151
  2 | before-backup-row-2 | 2026-07-08 09:55:42.07359
(2 rows)

postgres=# SELECT count(*) FROM blog_demo;
 count
-------
     2
(1 row)
Expected result: count is back to 2. Only before-backup-row-1 and before-backup-row-2 remain — after-backup-should-disappear is gone. This confirms the restore worked. The cluster’s data went back to exactly the state it was in when the backup was taken.
7. Another way to restore: Create DB from a backup
The Actions menu also has a second option, Create DB from a backup. Instead of restoring into the same cluster, this creates a brand new, separate cluster using the backup as its starting data. Your original cluster keeps running, untouched.
This is useful when you want a separate copy of your data — for testing, staging, or checking older data — without affecting the live database.
To use it: Actions → Create DB from a backup → select your backup → complete the wizard with a new cluster name.
8. Conclusion
In this guide, we set up RustFS as a self-hosted, open-source alternative to cloud storage for OpenEverest backups. We connected it to a PostgreSQL database, took a backup, and confirmed it was actually stored in RustFS. Then we tested a full restore using real data, and confirmed the database came back to exactly the state it was in when the backup was taken.
This gives you a complete, open-source path for backing up and restoring your databases on OpenEverest — without depending on any cloud provider.
If you try this out, we’d love to hear about it. Feel free to join the OpenEverest community and share your experience.
Join the Community
- Contribute: If you want to dive in, check out our Good First Issues and repositories.
- Chat: Join the conversation in the CNCF Slack (channel: #openeverest-users).
- Explore: See how we’re simplifying databases at openeverest.io/#community.
 Sergey Pronin