Running OpenEverest on Google Kubernetes Engine (GKE): A step-by-step guide
This walkthrough gets OpenEverest running on a GKE cluster and walks you through creating a PostgreSQL database you will connect to. By the end you’ll have the platform installed, a database provisioned from the UI, and a working connection - either through port forwarding or a load balancer. Along the way we’ll also cover GKE storage classes and how to keep database traffic on your private network with an internal load balancer.
You’ll need a Google Cloud account with billing enabled and a basic understanding of Kubernetes for this guide to be useful. If you’re just getting started, you can also try it with a free trial account.
In this guide:
- Prerequisites
- Configure Google Cloud
- Create GKE cluster
- Install OpenEverest
- Create a database instance
- Connect to the database
- Cleanup
Prerequisites
You’ll need the following tools installed:
- gcloud - to manage your Google Cloud resources from the terminal
- kubectl - to interact with your Kubernetes cluster
- everestctl - the OpenEverest CLI
Install gcloud on macOS:
brew install --cask gcloud-cli
export PATH=$HOMEBREW_PREFIX/share/google-cloud-sdk/bin:"$PATH"
Install everestctl on macOS:
brew tap openeverest/tap
brew install everestctl
On Linux or Windows, follow the everestctl install docs.
A quick sanity check to see if everything is installed correctly:
gcloud version
kubectl version --client
everestctl version --client-only
1. Configure Google Cloud
Log in and set up
gcloud auth login opens a browser window so you can pick your Google Cloud account. After that, your shell should look something like this:
gcloud auth login
Your browser has been opened to visit:
    https://accounts.google.com/o/oauth2/auth?code_challenge=...

You are now logged in as [you@example.com].
Your current project is [No project].

# To set the active project, run:
    $ gcloud config set project PROJECT_ID
We’ll also need to install kubectl to create and manage our GKE clusters.
gcloud components install kubectl
Next, create a new project called openeverest-test:
gcloud projects create openeverest-test
Or use an existing project - list what you have with:
gcloud projects list
Copy the project ID you want and run:
gcloud config set project <YOUR_PROJECT_ID>
Important! Whichever project you pick, make sure the Kubernetes Engine API is enabled. Here’s how to turn it on.
2. Create cluster
This creates a zonal cluster with 2 worker nodes (e2-standard-4, 4 vCPU / 16 GB each) in us-central1-a. Fine for a test run on a free trial you may need a smaller machine type or fewer nodes to stay within quota.
gcloud container clusters create <CLUSTER_NAME> \
  --project=openeverest-test \
  --zone=us-central1-a \
  --num-nodes=2 \
  --machine-type=e2-standard-4 \
  --disk-type=pd-standard \
  --disk-size=30 \
  --no-enable-autoupgrade
Creating cluster openeverest-gke-demo in us-central1-a... Cluster is being configured and may take several minutes to finish.
Use 'gcloud container clusters list' to see your clusters.

NAME                   LOCATION       MASTER_VERSION  MASTER_IP      MACHINE_TYPE   NODE_VERSION    NUM_NODES  STATUS
openeverest-gke-demo   us-central1-a  1.xx.3-gke.xxxx 35.xxx.xx.xx   e2-standard-4 1.29.3-gke.1260  2          RUNNING
If you’re on the GCP free trial, check the quotas for the region where you want to create the cluster. A few errors I hit before getting a stable cluster running:
Regional quota error
(gcloud.container.clusters.create) ResponseError: code=403, message=Insufficient project quota to satisfy request: resource “CPUS_ALL_REGIONS”: request requires ‘36.0’ and is short ‘24.0’. project has a quota of ‘12.0’ with ‘12.0’ available. View and manage quotas at https://console.cloud.google.com/iam-admin/quotas?usage=USED
SSD quota error
Insufficient quota to satisfy the request: Not all instances running in IGM after 38.19512474s. Expected 3, running 1, transitioning 2. Current errors: [GCE_QUOTA_EXCEEDED]: Instance ‘gke-cluster-1-default-pool-d2c0964a-2fkn’ creation failed: Quota ‘SSD_TOTAL_GB’ exceeded. Limit: 250.0 in region us-central1.
Note: This command doesn’t guarantee a stable cluster in every region. You might need a bit of trial and error. I found tweaking
disk-typeanddisk-sizehelped find a sweet spot - just don’t set them too low, or your database pods may struggle.
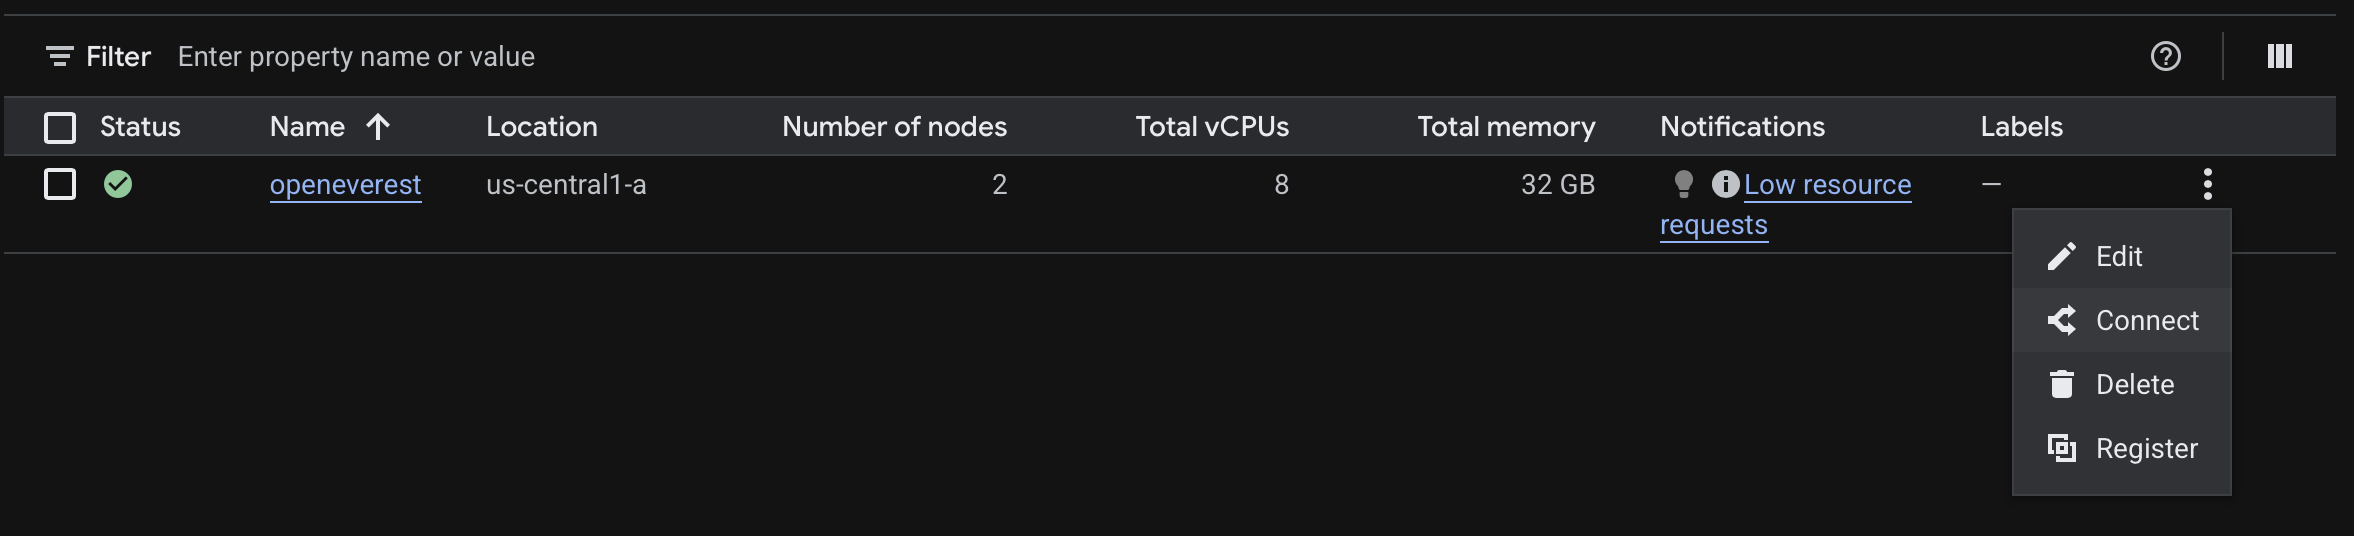
In the Cloud Console, you should see the cluster in a READY state.

Connect to the cluster from the CLI. In the console, click Connect:
Copy the command and run it in your terminal. It configures kubectl to talk to your cluster (you’ll see something like kubeconfig entry generated for ...):
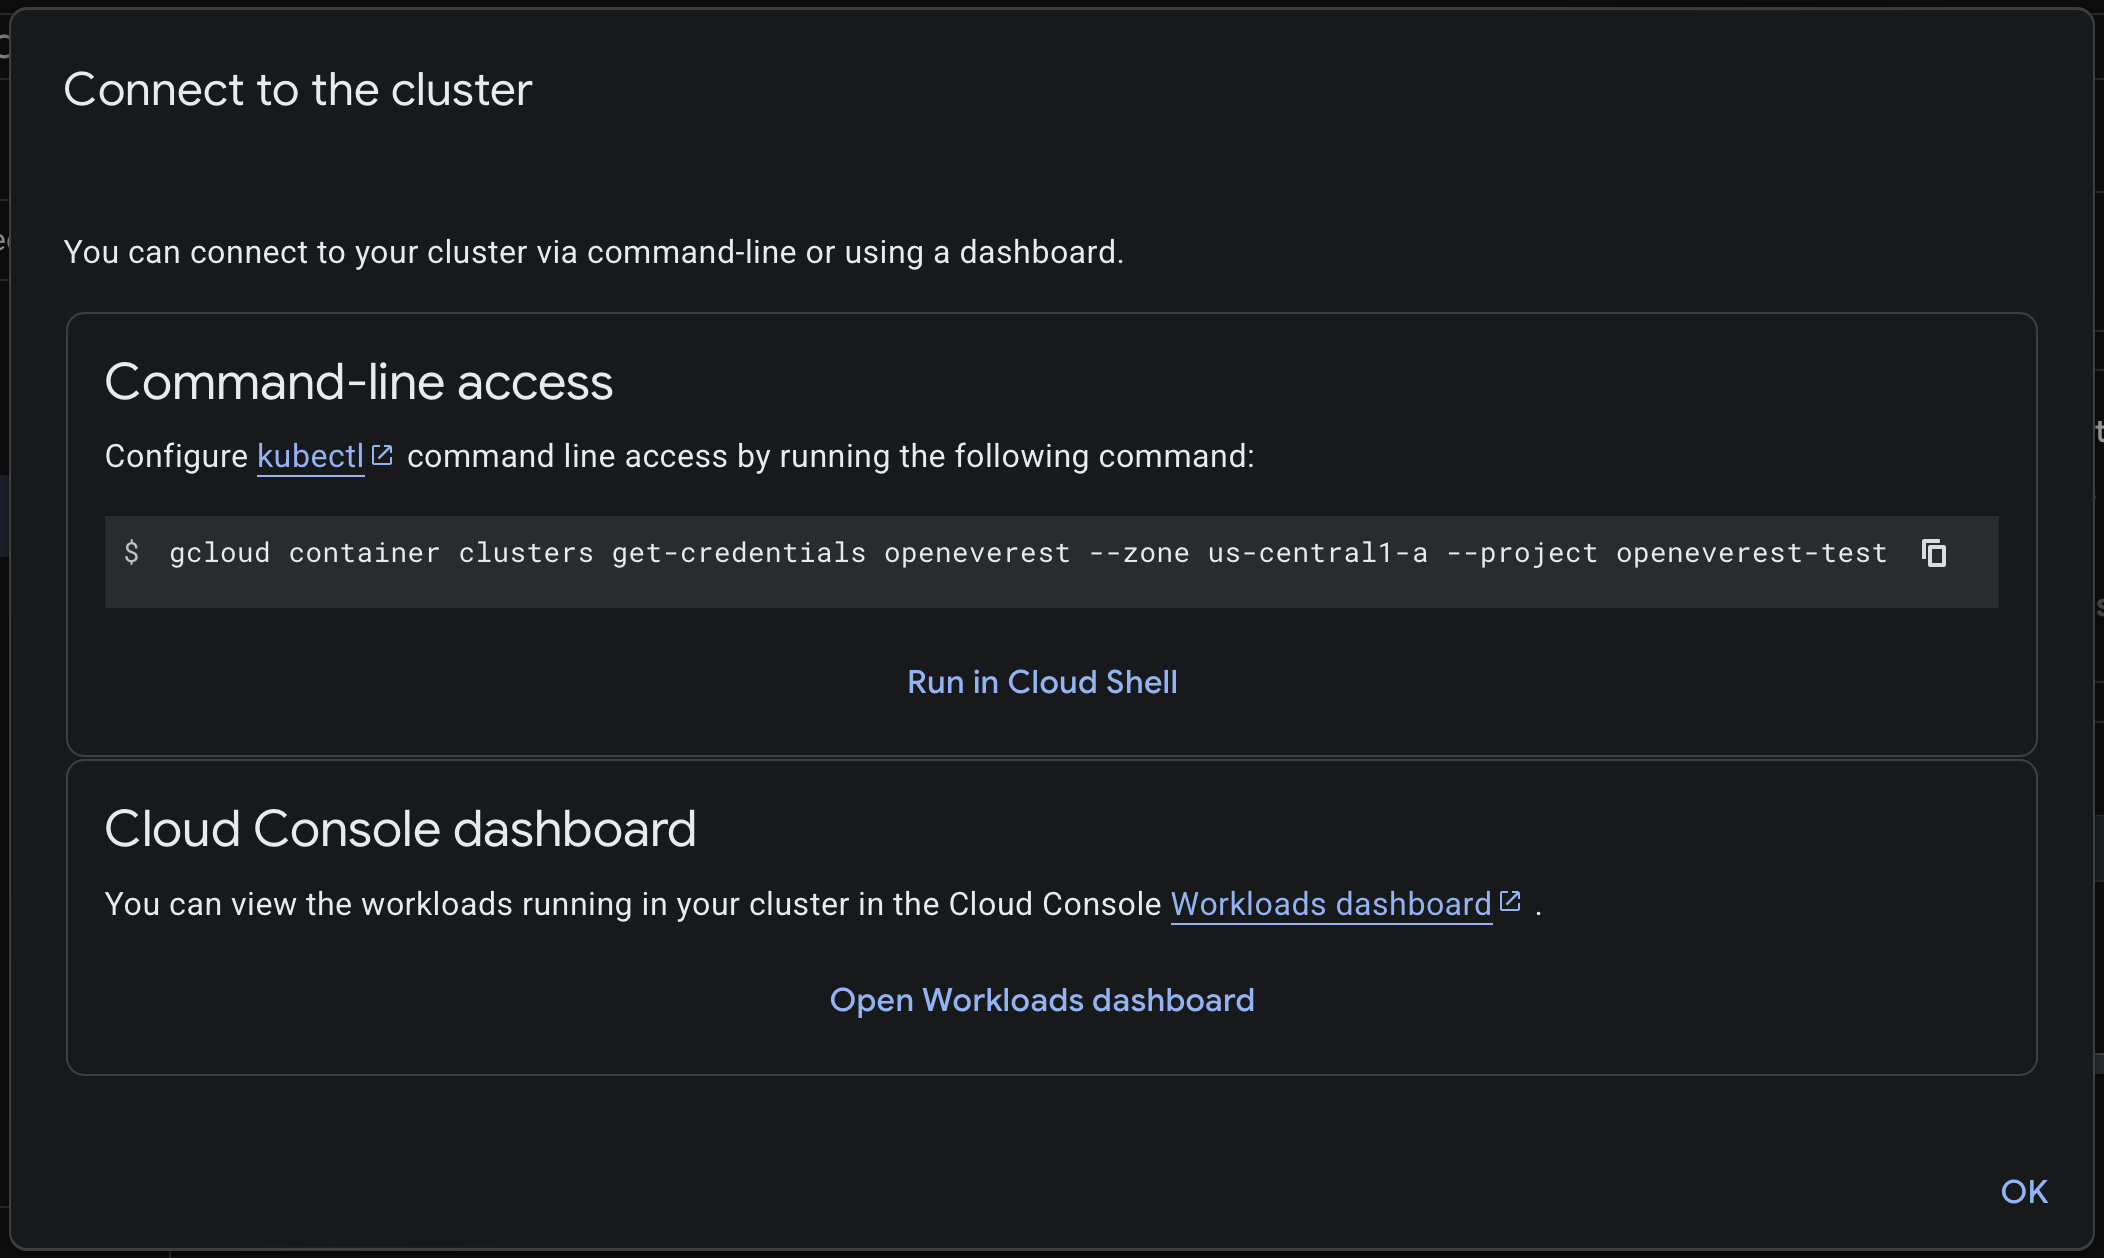
You should see the following output:
gcloud container cluster get-credentials openeverest --zone us-central1-a --project openeverest-test
Fetching cluster endpoint and auth data
kubeconfig entry generated for openeverest
Confirm both nodes are up:
kubectl get nodes
NAME                                    STATUS   ROLES    AGE   VERSION
gke-openeverest-gke-demo-default-pool-1a2b3cde   Ready    <none>   2m    v1.xx.3-gke.xxxx
gke-openeverest-gke-demo-default-pool-4f5g6hij   Ready    <none>   2m    v1.xx.3-gke.xxxx
GKE storage classes
GKE can provision persistent disks for your database PVCs through Kubernetes StorageClasses. Before you create a database, check what’s available on your cluster:
kubectl get storageclass
Once the Compute Engine persistent disk CSI driver is enabled, GKE installs two storage classes automatically:
standard-rwo- Disk type: balanced persistent disk (
pd-balanced) - Good for: general workloads, lower cost than SSD
- Disk type: balanced persistent disk (
premium-rwo- Disk type: SSD persistent disk (
pd-ssd) - Good for: PostgreSQL and other latency-sensitive workloads
- Disk type: SSD persistent disk (
Use kubectl get storageclass to verify that standard-rwo is available for you.
If you don’t see standard-rwo / premium-rwo, enable the CSI driver:
gcloud container clusters update <CLUSTER_NAME> \
  --zone=us-central1-a \
  --update-addons=GcePersistentDiskCsiDriver=ENABLED
For production PostgreSQL I’d use premium-rwo. Also confirm volume expansion is enabled if you plan to grow disks later:
kubectl get storageclass premium-rwo -o jsonpath='{.allowVolumeExpansion}{"\n"}'
Need a custom class? The example below is adapted from GKE’s Compute Engine persistent disk CSI driver docs - same provisioner and structure, with type: pd-ssd instead of the doc’s default pd-balanced:
# postgres-ssd-sc.yaml
apiVersion: storage.k8s.io/v1
kind: StorageClass
metadata:
  name: postgres-ssd
provisioner: pd.csi.storage.gke.io
parameters:
  type: pd-ssd
volumeBindingMode: WaitForFirstConsumer
allowVolumeExpansion: true
kubectl apply -f postgres-ssd-sc.yaml
3. Install OpenEverest
There are two ways to reach the OpenEverest UI: port forwarding (quick, nothing extra to provision) or a load balancer (public IP, no tunnel to keep open). Pick one before you install - the commands are nearly identical, with one extra flag for the load balancer path.
We’ll use everestctl in headless mode to skip the interactive wizard and keep everything reproducible from the terminal.
3.1 Port forwarding
everestctl install \
  --namespaces everest \
  --operator.postgresql=true \
  --operator.mongodb=true \
  --operator.mysql=true \
  --skip-wizard
ℹ️  Installing Everest version 1.15.2

✅  Installing Everest Helm chart
✅  Ensuring Everest API deployment is ready
✅  Ensuring Everest operator deployment is ready
✅  Ensuring OLM components are ready
✅  Ensuring Everest CatalogSource is ready
✅  Ensuring monitoring stack is ready
✅  Provisioning database namespace 'everest'

🚀  Thank you for installing Everest (v1.15.2)!

Follow the steps below to get started:

1 ➜ RETRIEVE THE INITIAL ADMIN PASSWORD:
Run the following command to get the initial admin password:

      everestctl accounts initial-admin-password

⚠️  NOTE: The initial password is stored in plain text. For security, change it immediately using the following command:

      everestctl accounts set-password --username admin

2 ➜ ACCESS THE EVEREST UI:
To access the web UI, set up port-forwarding and visit http://localhost:8080 in your browser:

      kubectl port-forward -n everest-system svc/everest 8080:8080
This provisions OpenEverest along with database operators for PostgreSQL, MySQL, and MongoDB - specialized Kubernetes controllers that handle database lifecycle operations. It can take a few minutes while images are pulled and controllers come up.
OpenEverest creates an initial admin account during install. On a fresh cluster, you can grab the bootstrap password with:
everestctl accounts initial-admin-password
5S0HB20FHFGUIJtsyeekJotdJ2QIcqYP74jFIa2xmNqLDpMgJ45aDP8BVbzBLacn
That gives you the temporary password for your first login. For anything beyond a quick test, change it right away - especially in production:
everestctl accounts set-password --username admin
? Provide a new password: *********
? Confirm a new password: *********
✅ Password for user 'admin' has been set successfully
Port-forward the UI (leave this terminal running):
kubectl port-forward svc/everest 8080:8080 -n everest-system
Then open http://localhost:8080 in your browser.
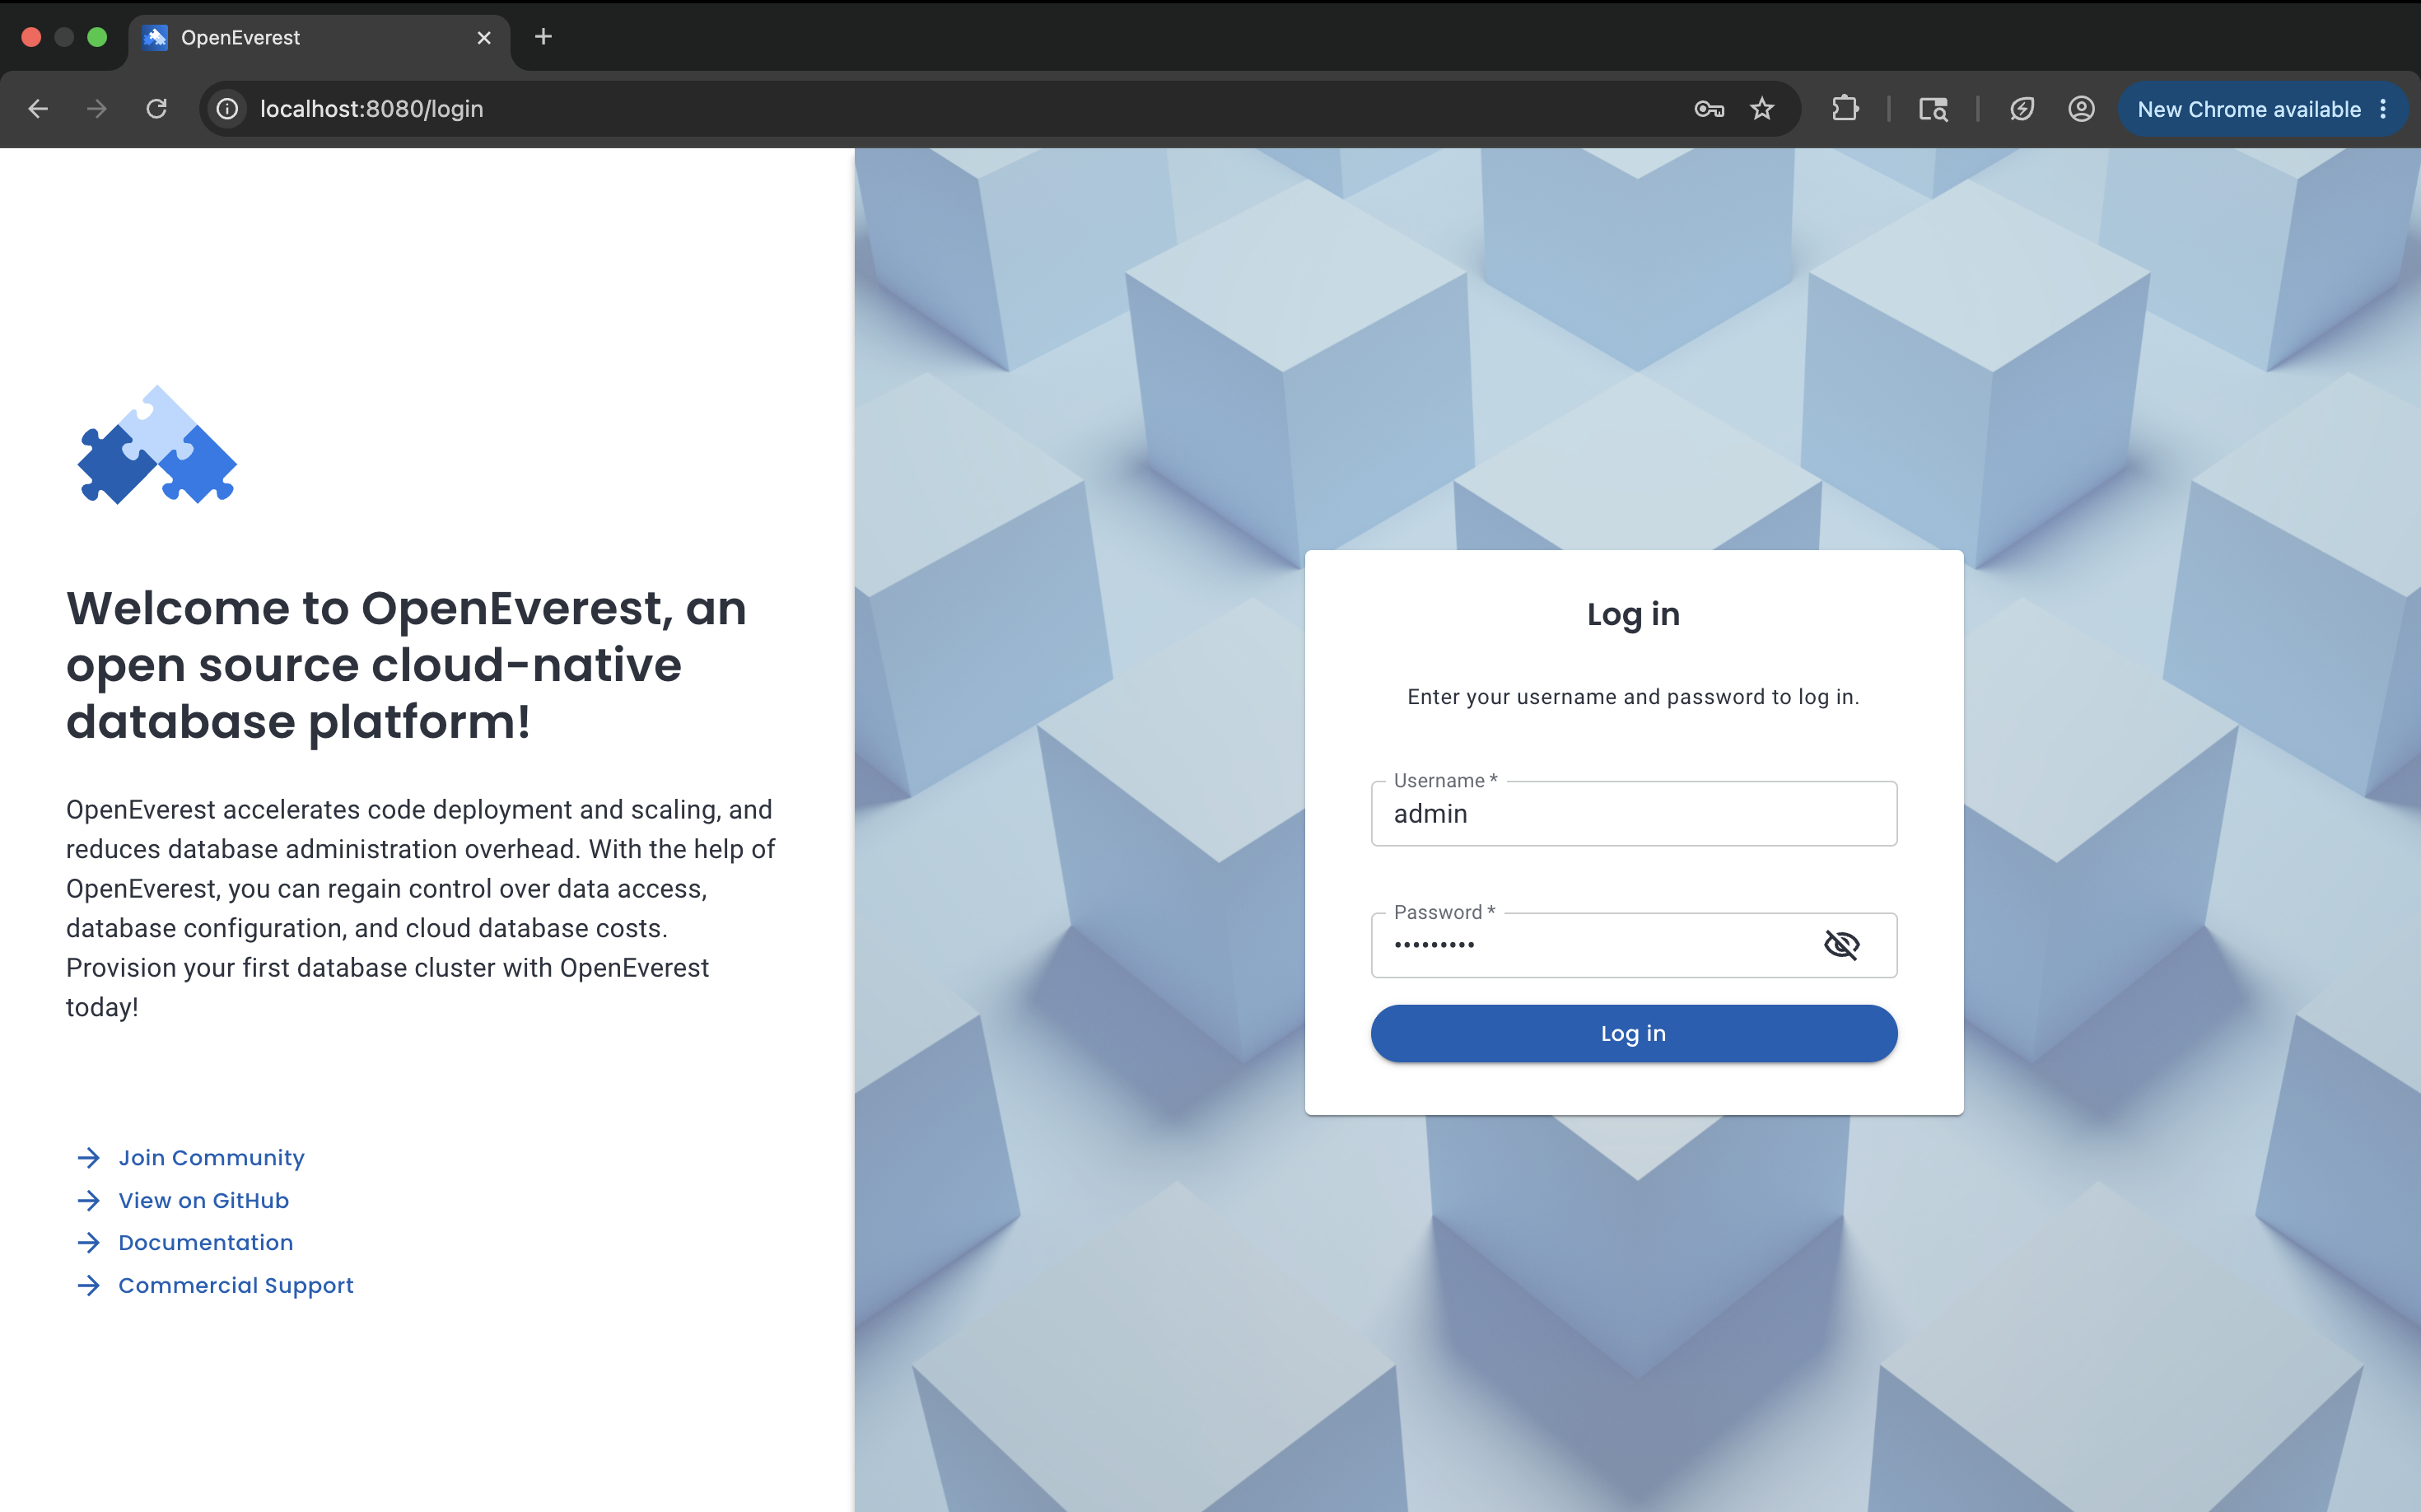
Log in with the credentials you set earlier.
3.2 Load balancer
Same install as above, but add --helm.set server.service.type=LoadBalancer so GKE provisions an external IP for the UI:
everestctl install \
  --namespaces everest \
  --operator.postgresql=true \
  --operator.mongodb=true \
  --operator.mysql=true \
  --helm.set server.service.type=LoadBalancer \
  --skip-wizard
Run the same password steps from 3.1 (initial-admin-password, then set-password).
GKE can take a minute or two to assign an external IP. Watch until EXTERNAL-IP is no longer <pending>:
kubectl get svc everest -n everest-system -w
Then open http://<EXTERNAL-IP>:8080 in your browser and log in.
4. Create a database instance
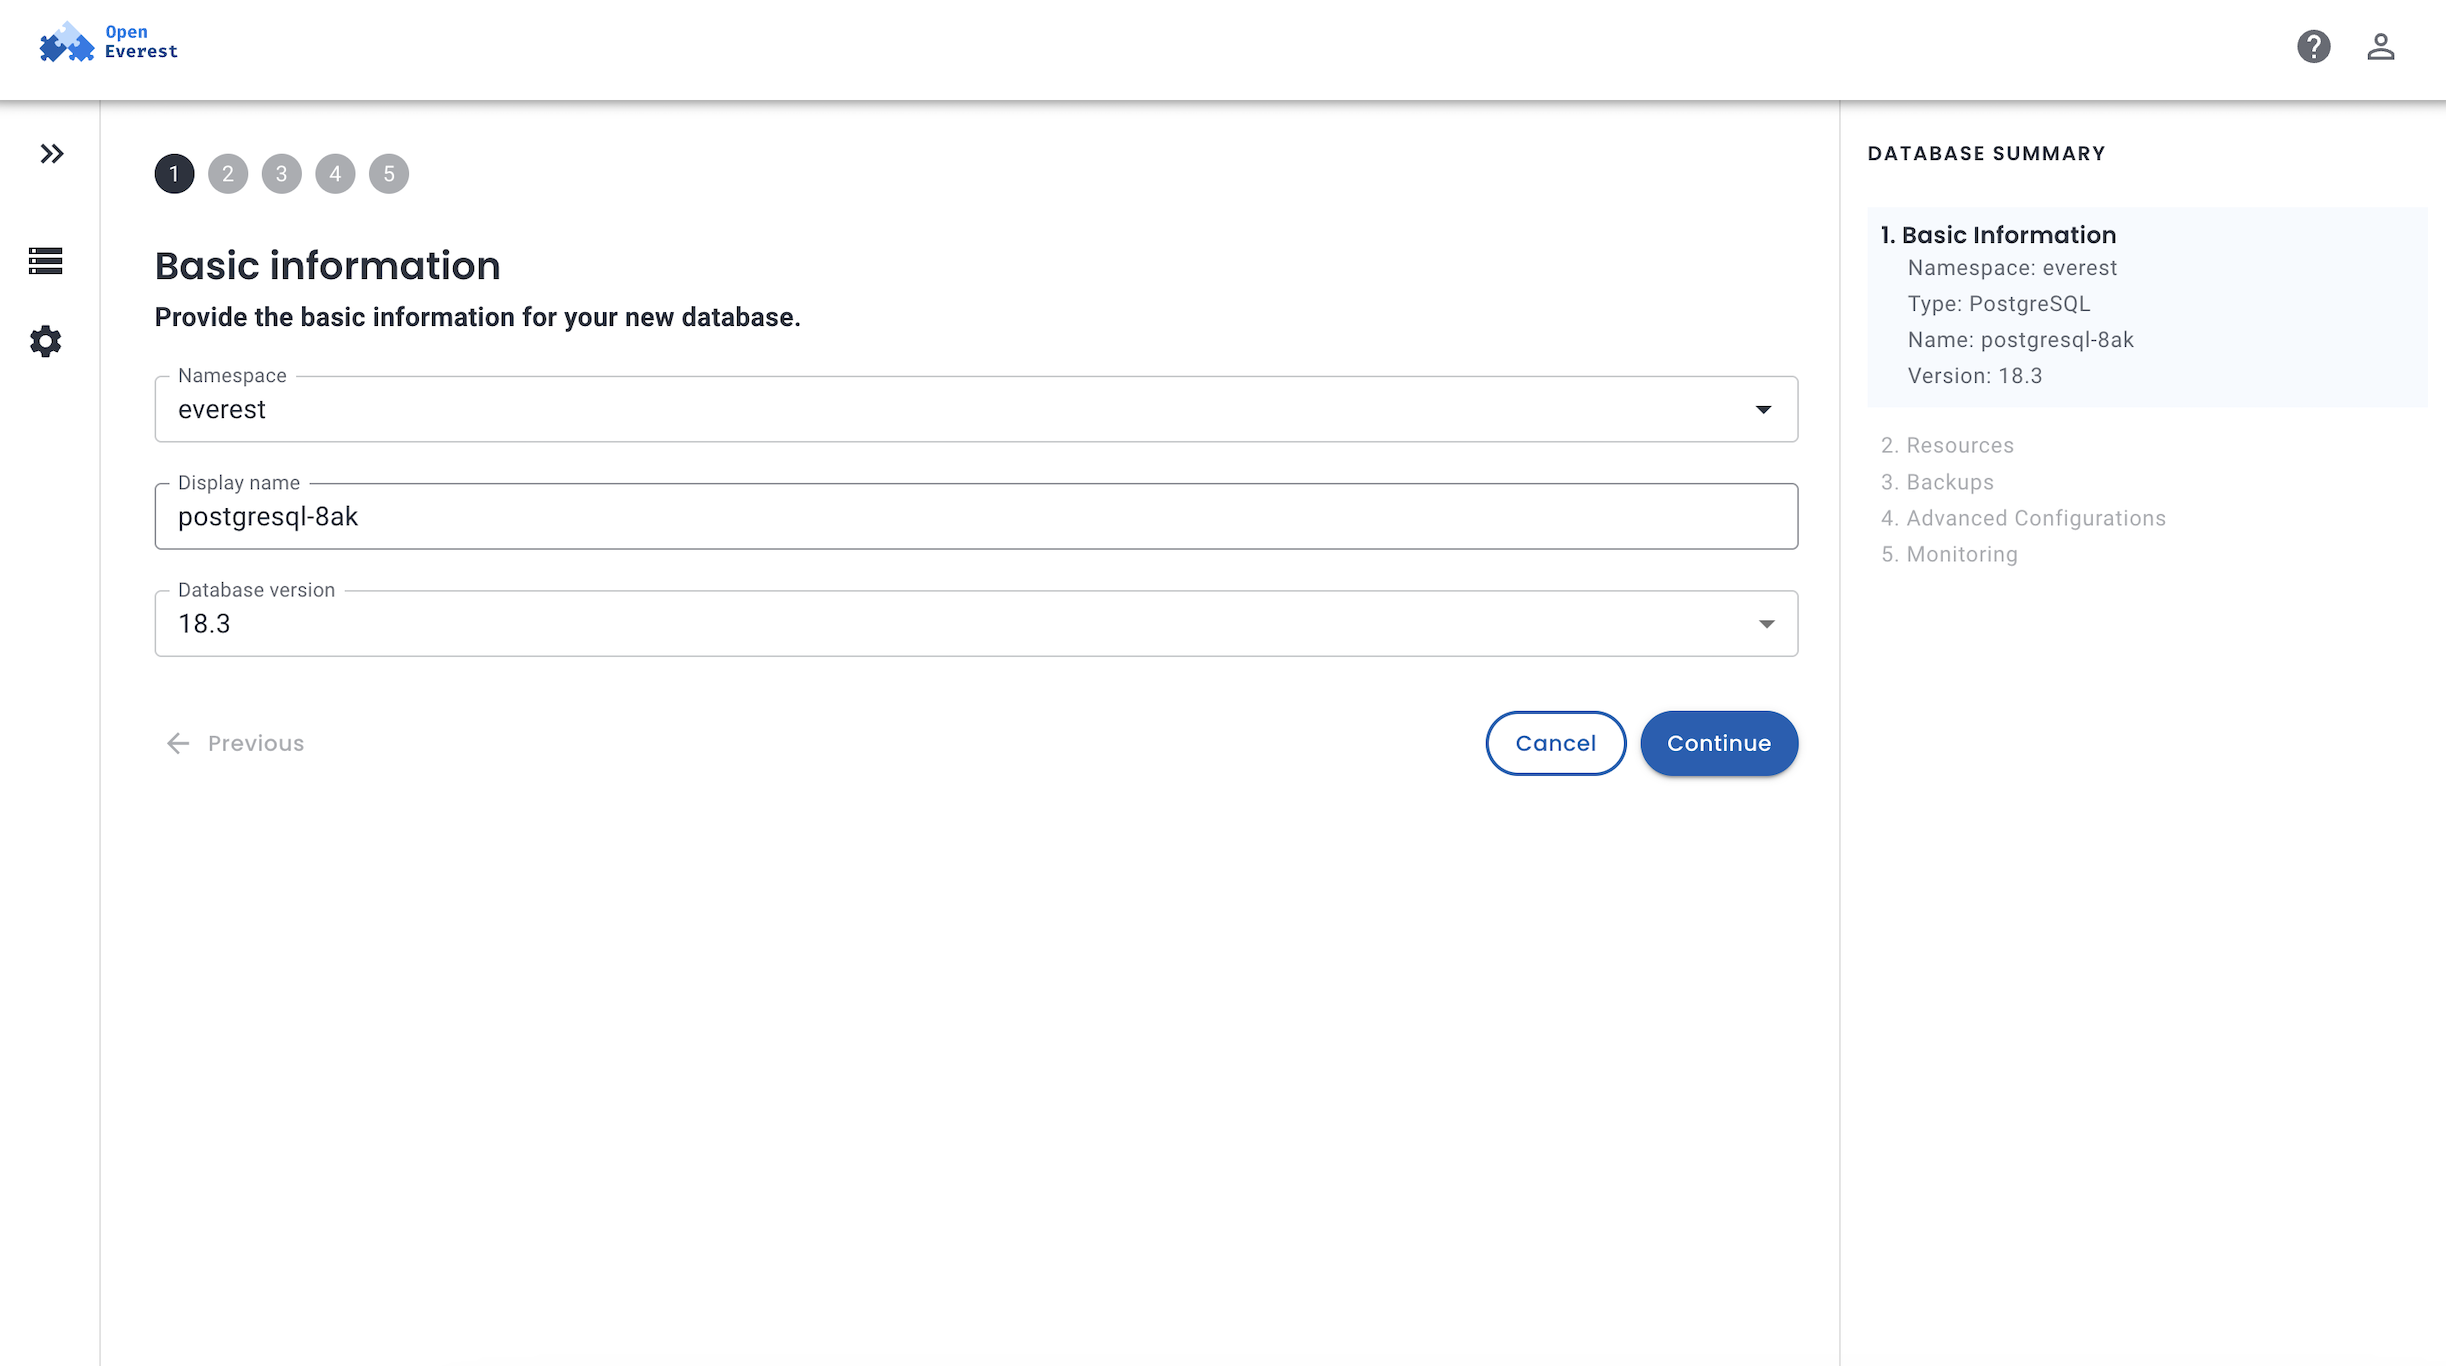
Click Create database and pick one of the three providers. For this walkthrough, I’m creating a small PostgreSQL instance.
I’ll keep the auto-generated name, pick a version, and leave the namespace as the default everest.
For resources, a single node with the smallest profile is plenty - we’re just going to connect and verify it works. Disk size is set here on the Resources page (25 Gi in my screenshot).
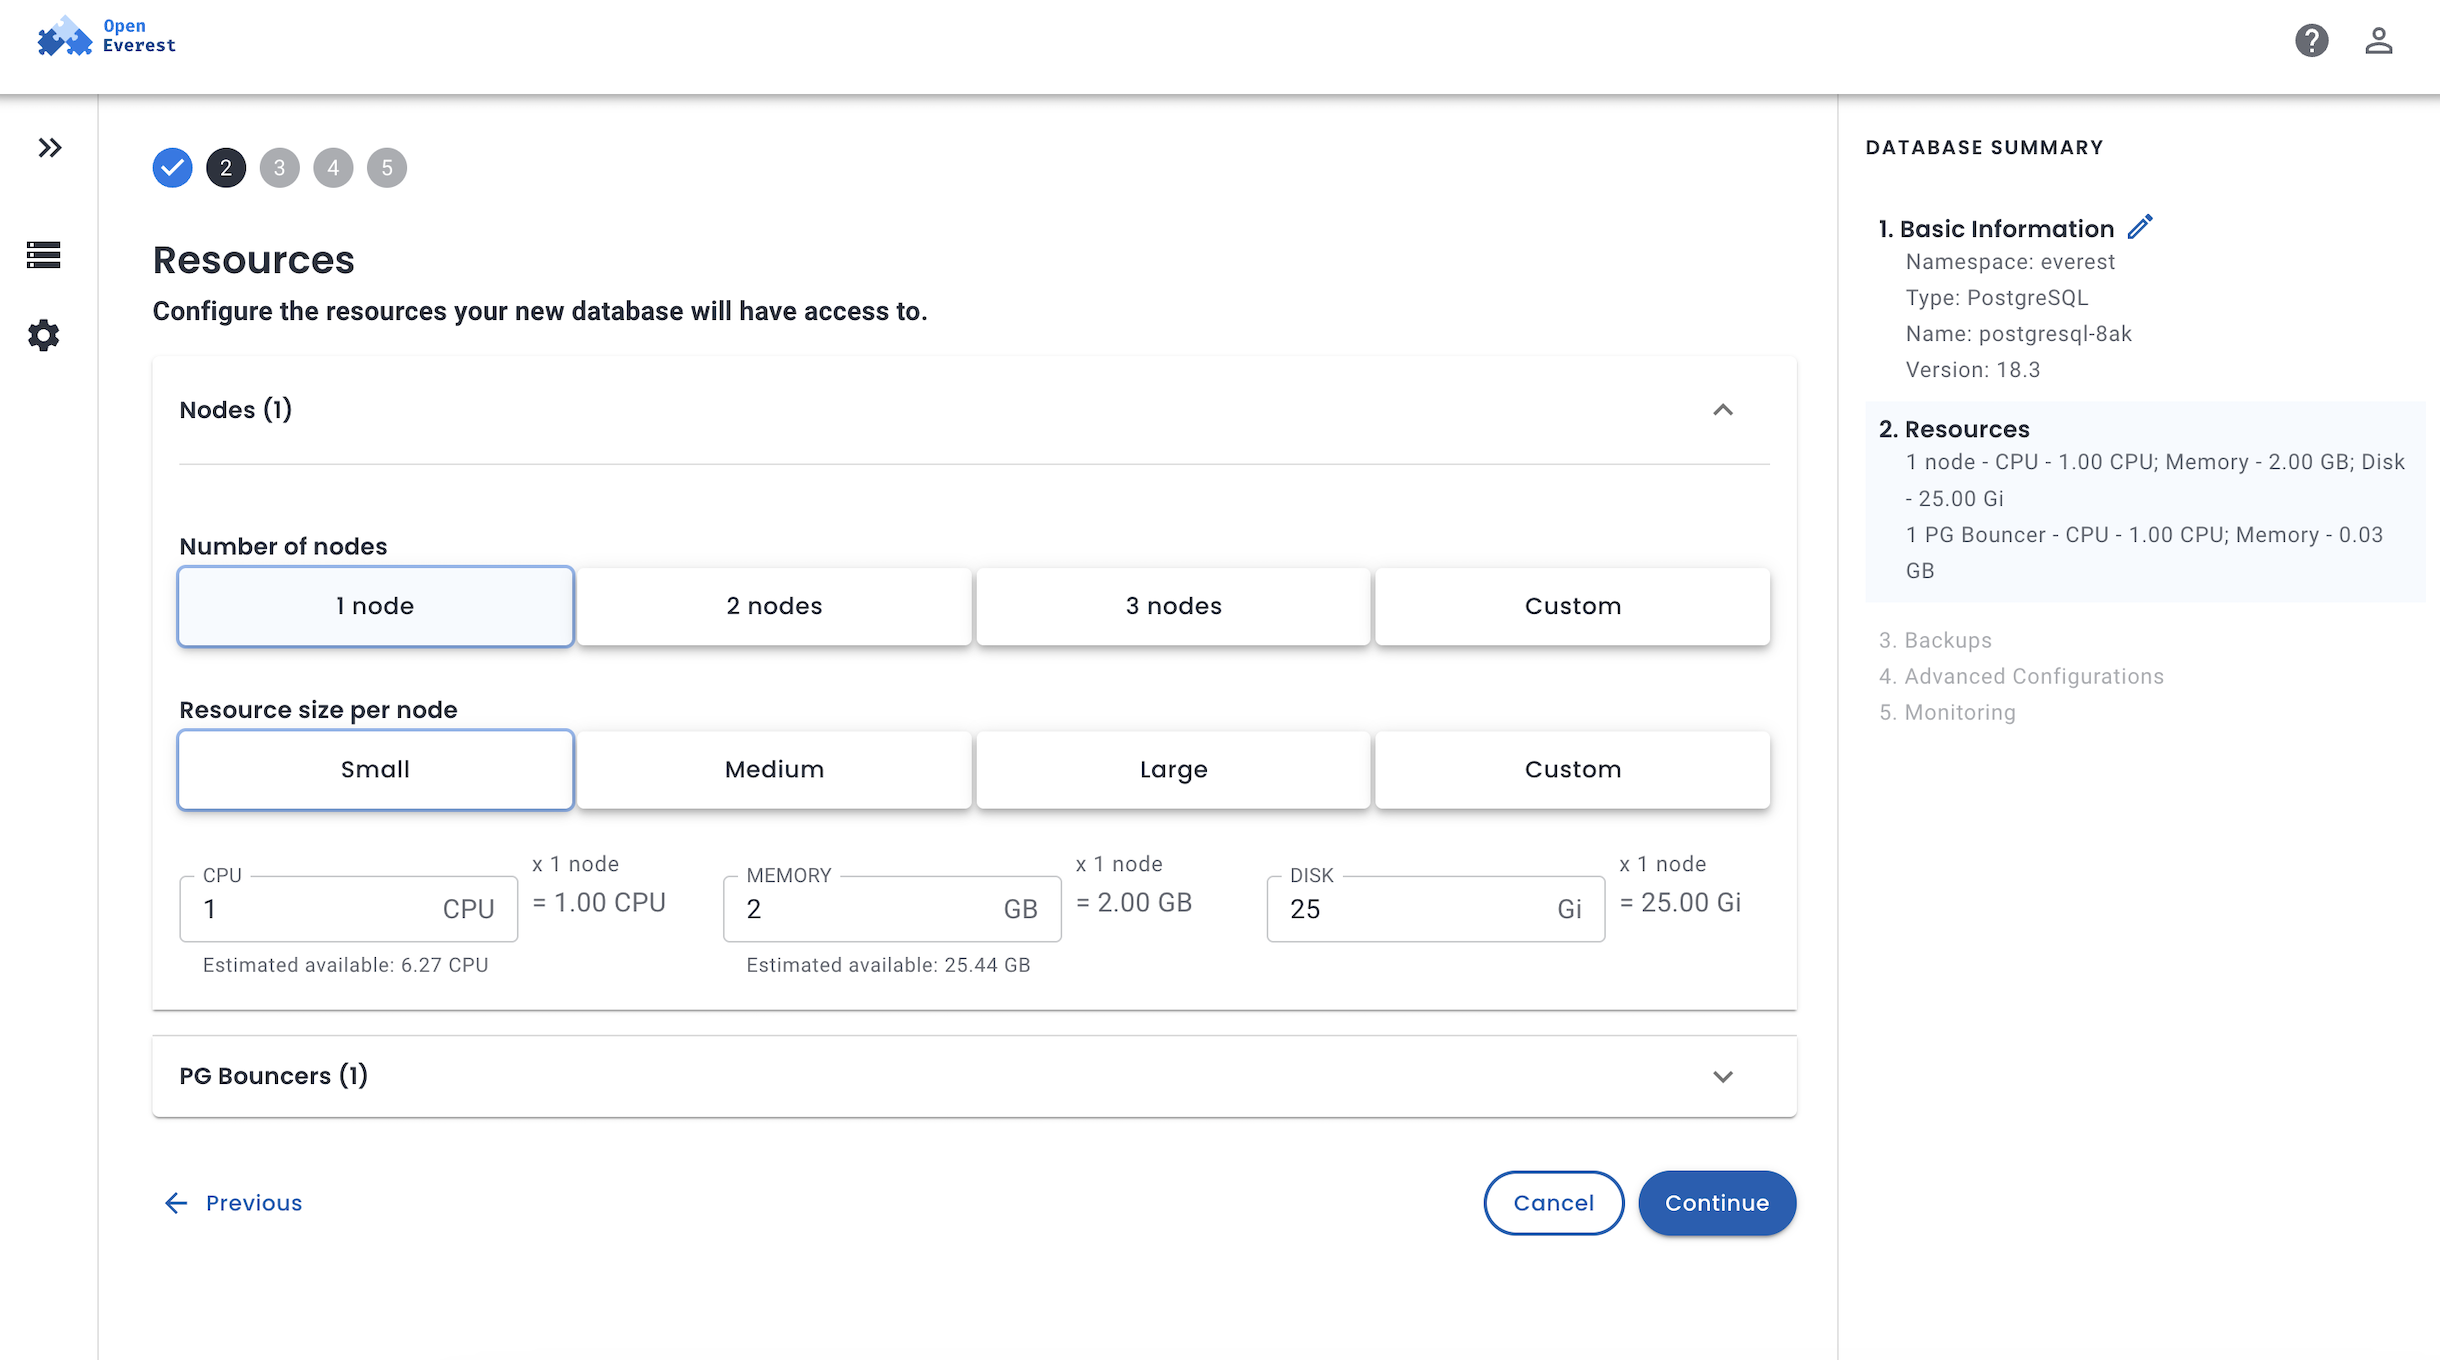
Stick with the defaults for everything else on that page unless you need load balancer or exposure settings, then click Create database. The OpenEverest docs go deeper on tuning these if you need to.
Once the database is provisioned, you can click on the Components tab and view the individual Kubernetes workloads backing the PostgreSQL cluster. It should all be up and running.
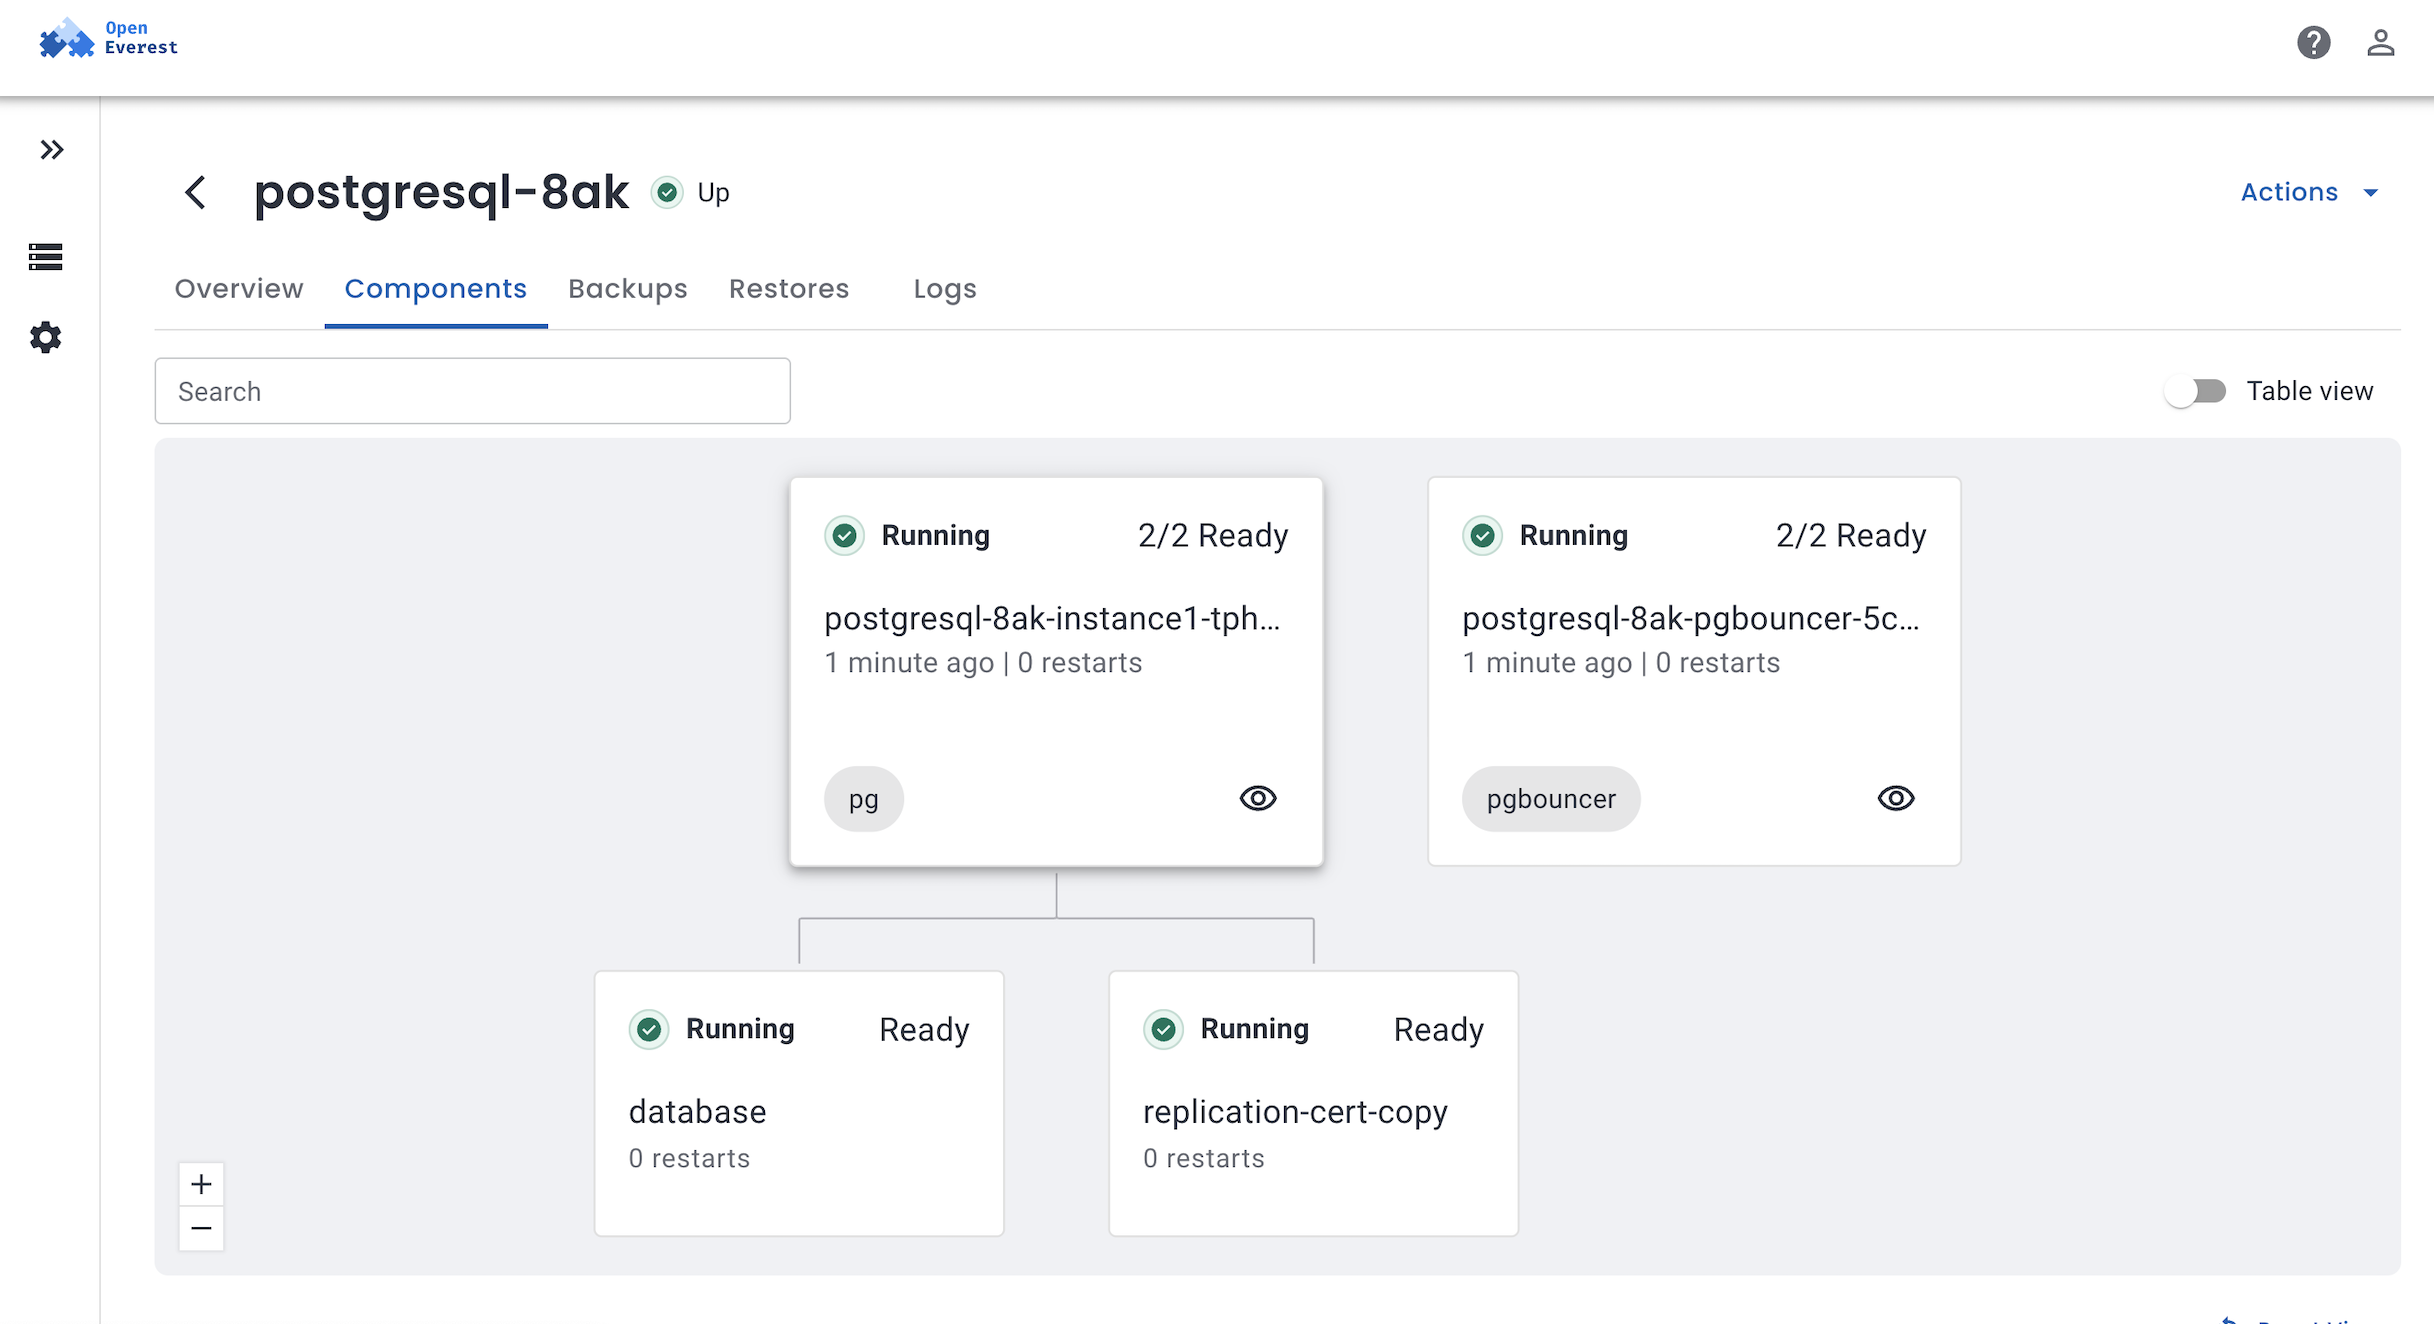
Note: If a node gets stuck in
PendingorInitializing, check the pod events:
# How many nodes?
kubectl get nodes

# Why a pod is pending (look at Events at the bottom)
kubectl describe pod <pod_name> -n <namespace>
5. Connect to the database
Via Port forwarding
Your PgBouncer service name will differ from mine - find yours with:
kubectl get svc -n everest | grep pgbouncer
Forward it to your machine (replace the service name below):
kubectl port-forward -n everest svc/<YOUR-DB>-pgbouncer 5432:5432
Leave that running, then copy the connection string from the Overview tab in the UI:
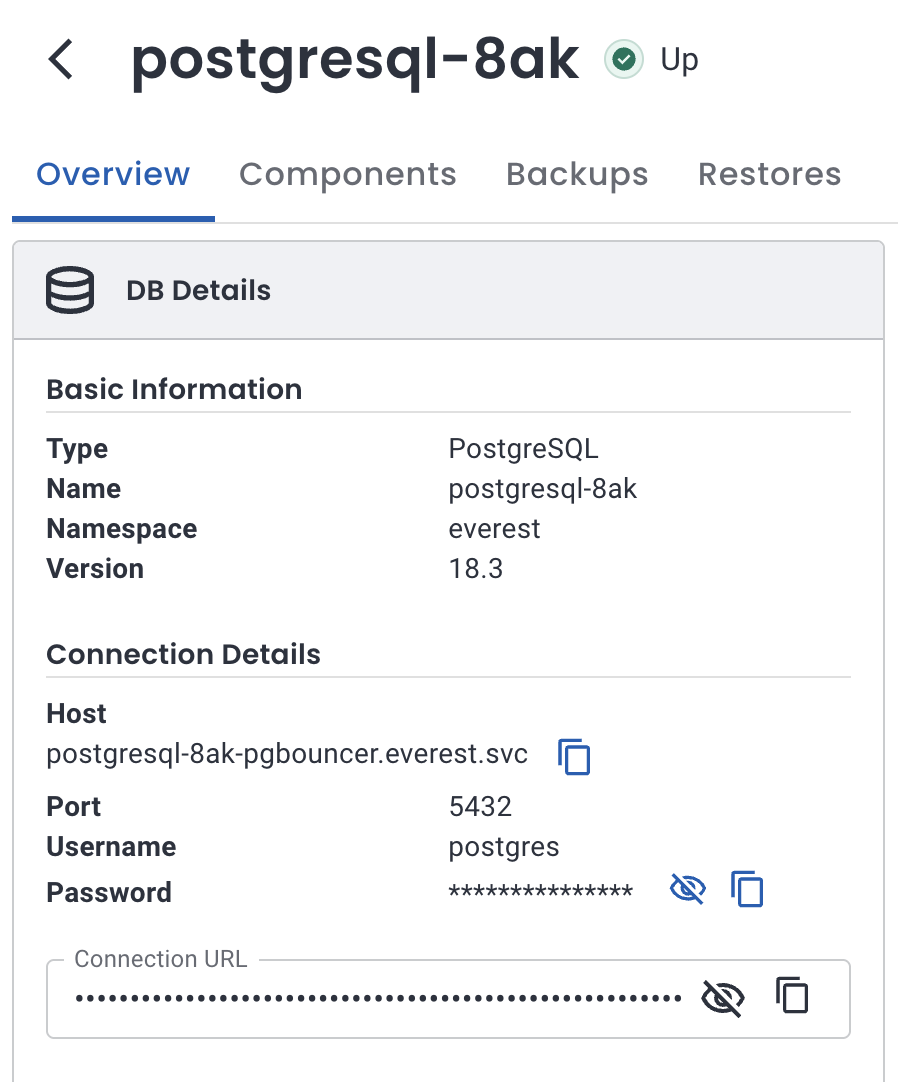
Swap the host from postgresql-<...>-pgbouncer.everest.svc to localhost - everything else (including the password) stays the same:
psql "postgres://postgres:<YOUR_PASSWORD>@localhost:5432/postgres"
psql (16.1, server 16.0)
SSL connection (protocol: TLSv1.3, cipher: TLS_AES_256_GCM_SHA384, bits: 256)
Type "help" for help.

postgres=#
Via load balancer
Exposing a database with a load balancer gives it a stable IP outside the Kubernetes cluster network. GKE supports external (internet-facing) and internal (VPC-only) passthrough Network Load Balancers. OpenEverest handles both through the same load balancer configuration - you control the behavior with Service annotations.
You can set this during database creation on the Advanced Configurations page, or afterward via Edit Advanced configuration on an existing instance. In both cases, set Exposure method to Load balancer, pick a configuration, and optionally restrict Source range.
OpenEverest maps Source range to Kubernetes
loadBalancerSourceRanges. On GKE, that also drives VPC firewall rules for the load balancer. Values must be CIDR blocks - use/32for a single IP (e.g.203.0.113.25/32), not a bare address.
External load balancer
Use this when clients outside your VPC need to reach the database - testing from your laptop, or an app on the public internet with strict IP filtering.
Create a load balancer config
Go to Settings → Policies, then in Load Balancer Configuration click Configure.
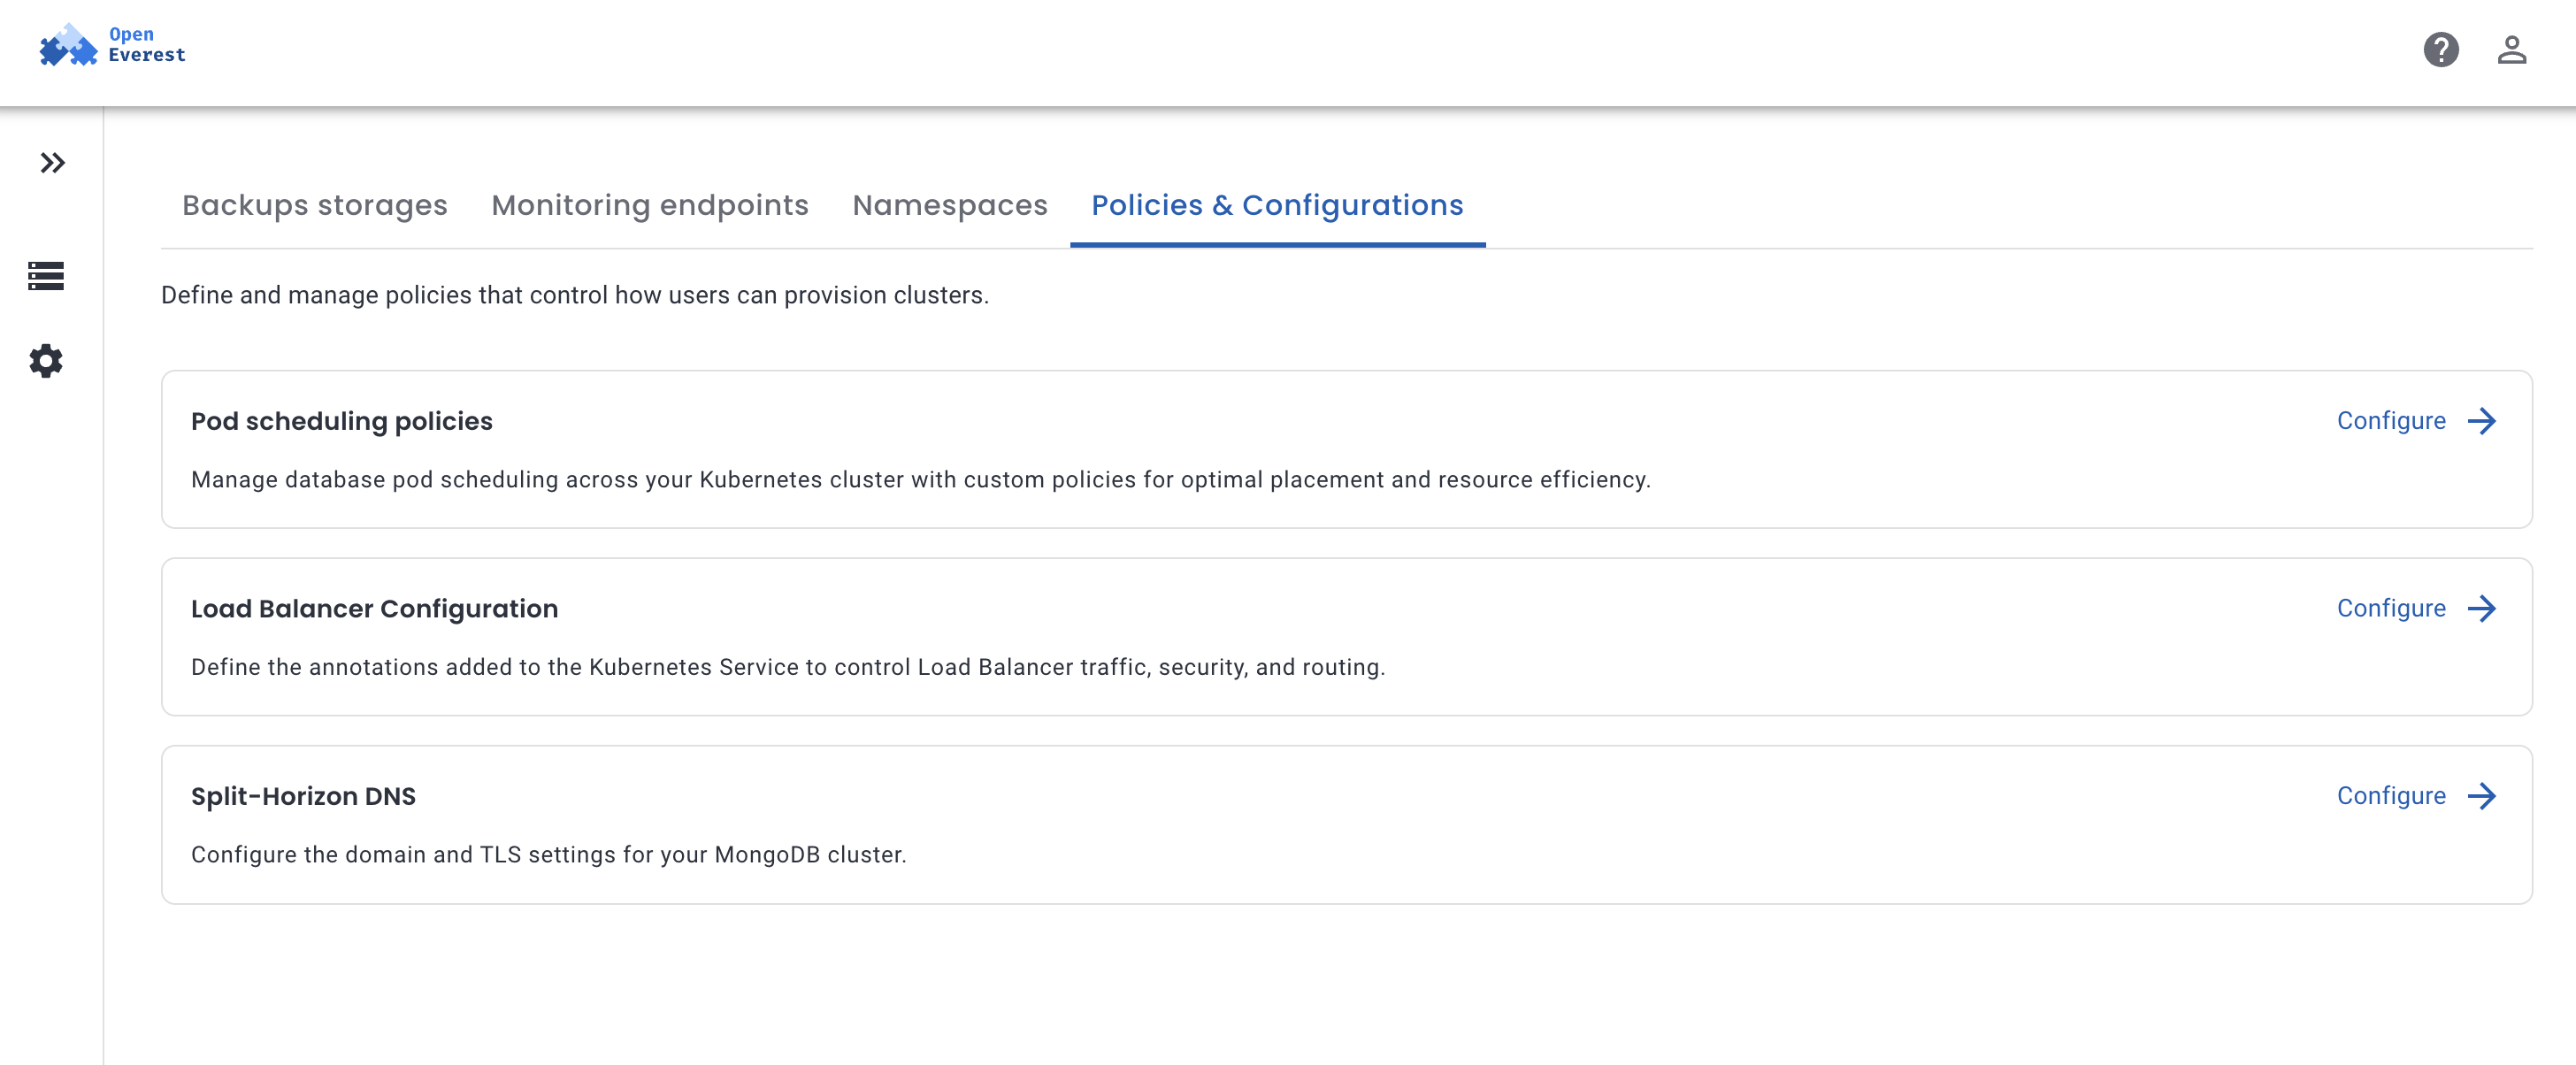
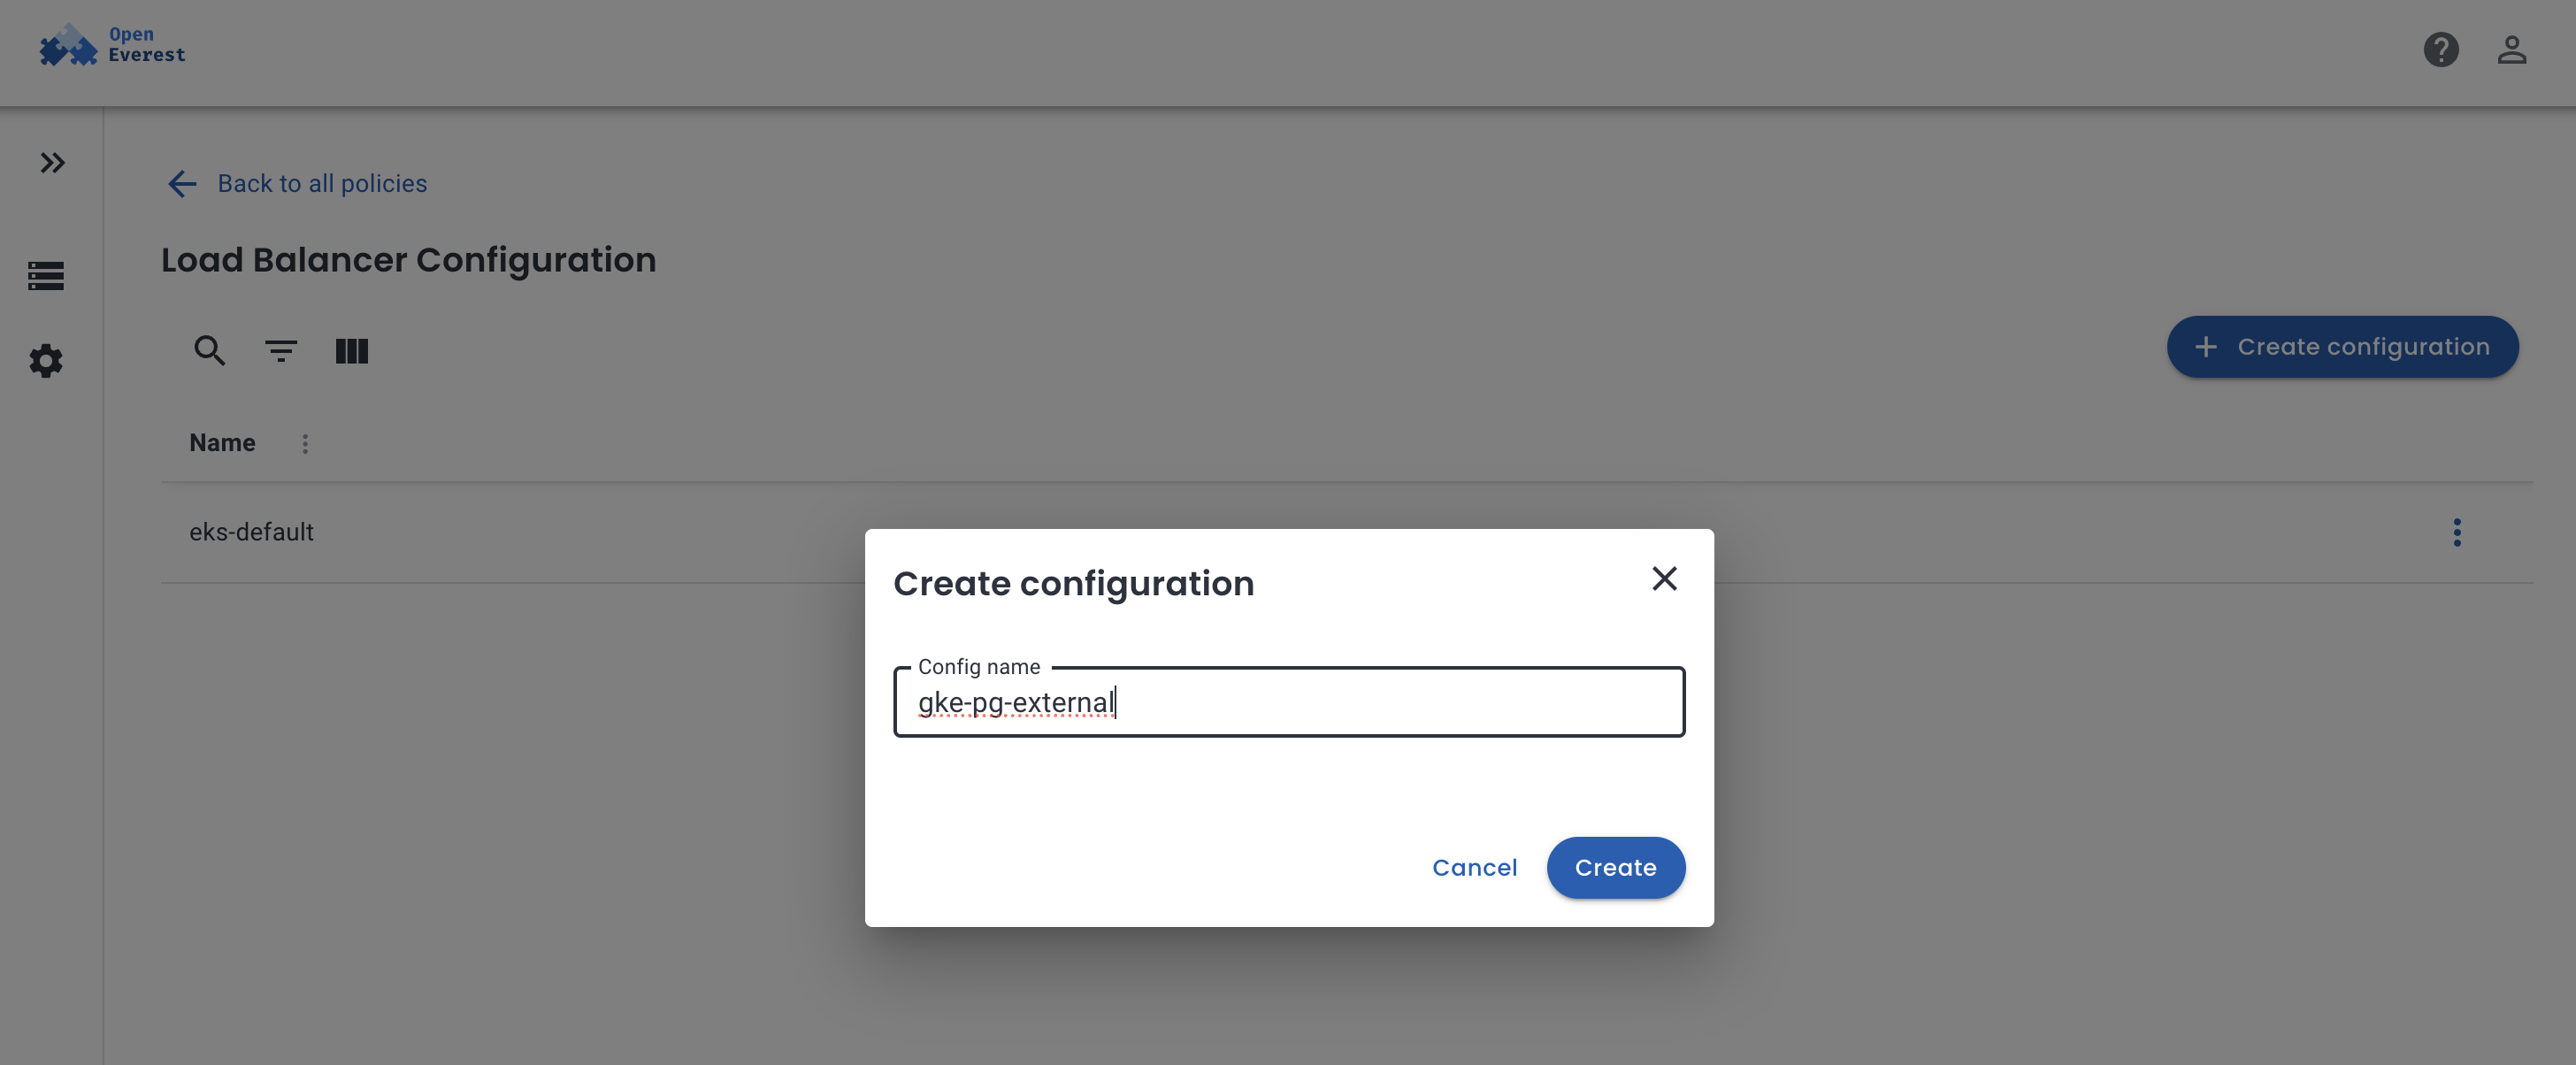
Click Create configuration, give it a name, and leave annotations empty for a default external LB on GKE. If you need a reserved static IP, first create one in the same region as your cluster:
gcloud compute addresses create everest-db-ip --region=us-central1
Then add this annotation (the value is the address resource name, not the IP itself):
networking.gke.io/load-balancer-ip-addresses: everest-db-ip
Go back to your database and open Edit Advanced configuration (or set this on the Advanced Configurations page during creation):
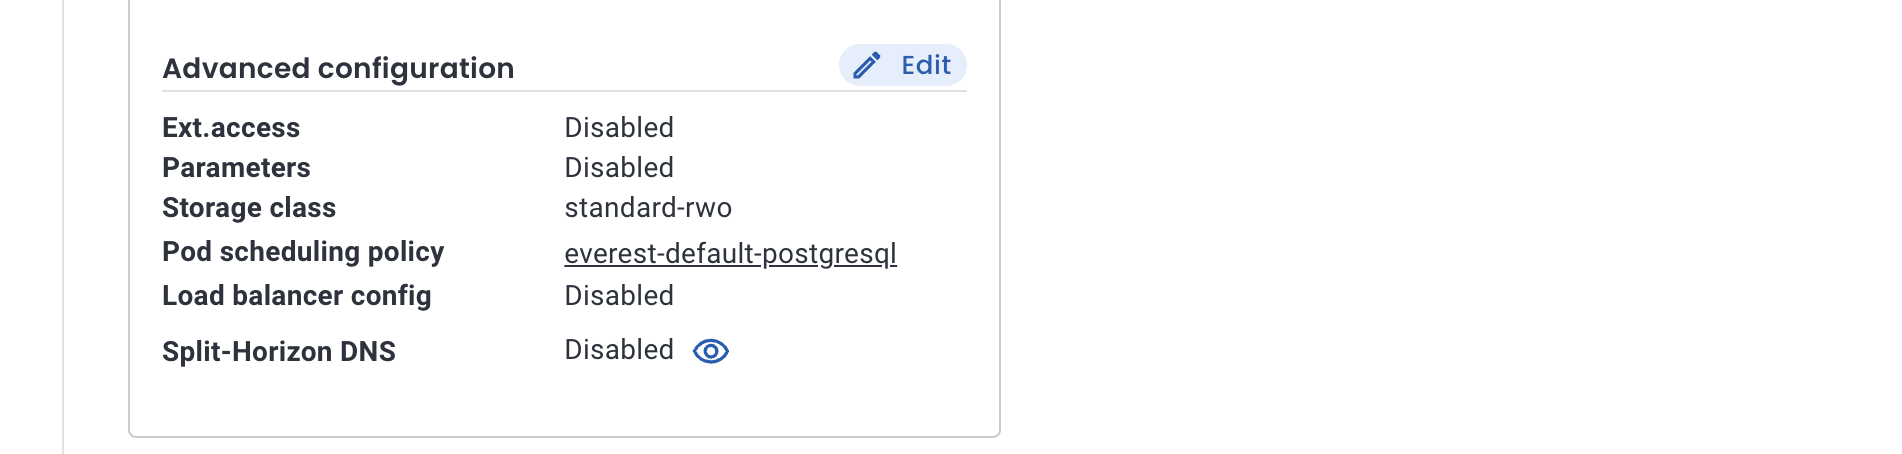
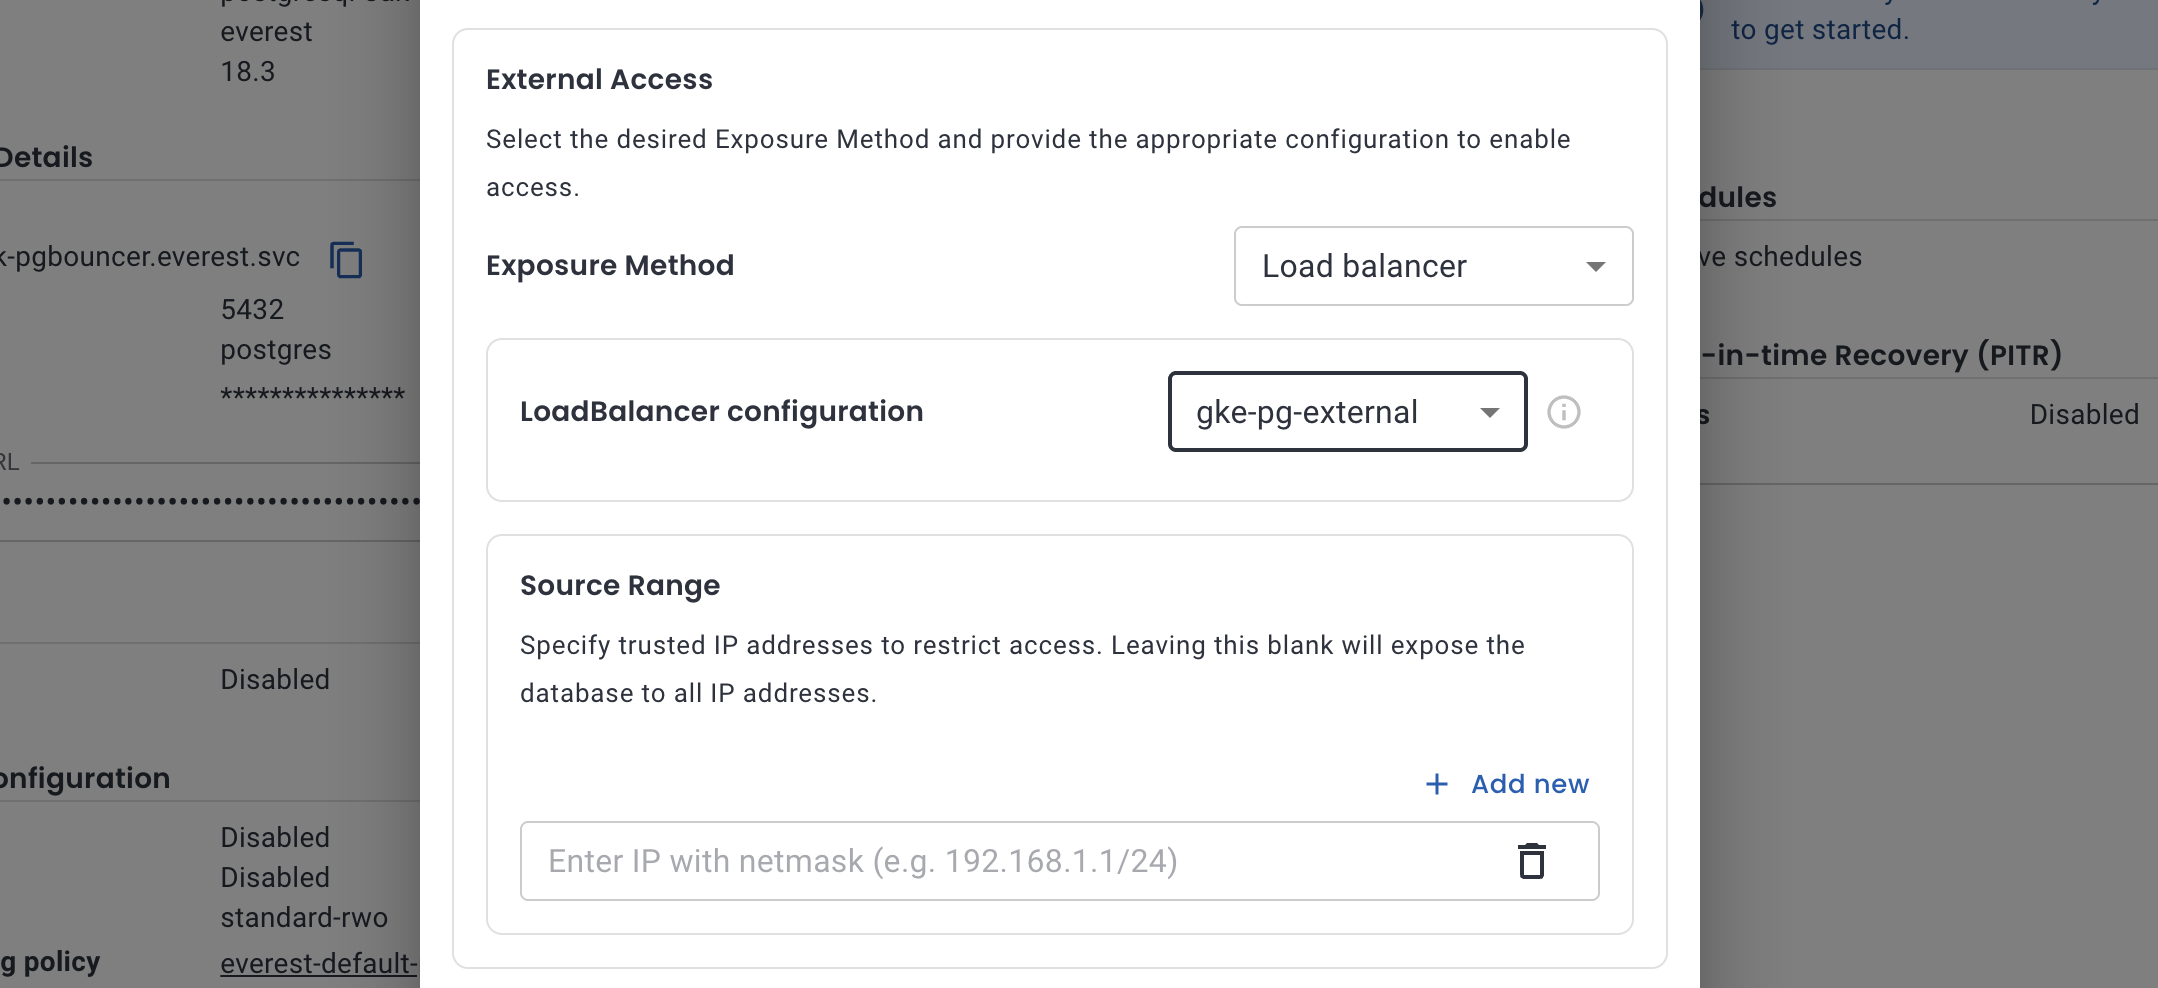
Set Exposure method to Load balancer and pick the configuration you just created.
Restrict Source range to your public IP (e.g.
203.0.113.25/32).
Click Save and wait for the operator to reconcile (usually 1–5 minutes).
Get the external IP
kubectl get svc <YOUR-DB>-pgbouncer -n everest -w
NAME                TYPE           CLUSTER-IP      EXTERNAL-IP    PORT(S)          AGE
<YOUR-DB>-pgbouncer   LoadBalancer   10.xx.x.xxx    35.xxx.xx.xx   5432:32713/TCP,   4m33s
Wait until EXTERNAL-IP is a public IP (not pending):
The Everest UI Host should also update from *.everest.svc to that IP once ready.
Copy the connection string from Overview - the host will already point at the external IP:
psql "postgres://postgres:<YOUR_PASSWORD>@<EXTERNAL-IP>:5432/postgres"
SSL connection (protocol: TLSv1.3, cipher: TLS_AES_256_GCM_SHA384, bits: 256, compression: off)
Type "help" for help.

postgres=#
Internal load balancer
If your apps run in the same VPC - another GKE cluster, a GCE VM, Cloud Run with a VPC connector, an internal load balancer keeps the database off the public internet. The IP is still outside the Kubernetes cluster, but only routable within your VPC.
Create a load balancer configuration the same way, but add:
networking.gke.io/load-balancer-type: Internal
Attach it the same way - Exposure method → Load balancer, pick your internal config, and save.
Set Source range to your VPC subnet (e.g.
10.128.0.0/20) so only in-network clients can connect. Same CIDR format rules apply.
After reconciliation:
kubectl get svc <YOUR-DB>-pgbouncer -n everest -w
The EXTERNAL-IP column will show a private address (e.g. 10.128.0.5) - that’s expected for internal LBs in Kubernetes. Connect from a VM in the same VPC:
psql "postgres://postgres:<YOUR_PASSWORD>@<INTERNAL-IP>:5432/postgres"
SSH into the VM inside the network to reach this (gcloud compute ssh works well for a quick test).
The OpenEverest load balancer docs cover annotations in more detail, including Go templates for multi-cluster setups. For GKE-specific networking (Shared VPC, cross-region access), see Google’s guide on internal load balancing.
6. Cleanup
A running GKE cluster can cost around $1/hour, plus Compute Engine charges for the underlying nodes. If you’re done experimenting, tear it down:
everestctl uninstall
gcloud container clusters delete <CLUSTER_NAME> --zone=us-central1-a
Deleting the cluster alone won’t remove everything - persistent disks, load balancers, and external IPs can linger and keep billing. Double-check these before you walk away:
- Persistent Disks (Storage): Go to Compute Engine > Storage > Disks, locate the disks associated with your GKE cluster, and delete them.
- Network Load Balancers: Go to Network Services > Load Balancing. Inspect the list for load balancers dynamically created for your cluster and delete them.
- External IP Addresses: VPC Network > IP addresses, look for IPs that are no longer associated with any resource, and release them.
Join the Community
- Contribute: If you want to dive in, check out our Good First Issues and repositories.
- Chat: Join the conversation in the CNCF Slack (channel: #openeverest-users).
- Explore: See how we’re simplifying databases at openeverest.io/#community.


 Neel Shah
